Let’s set the scene. You see a three day weekend approaching. Or, you see a weekend that actually has some spare time available. You think, “hey, I could actually get that big project done that I’ve been putting off because it would just take too long.” Or you say, “I’ve been wanting to try to do this thing I saw on Pinterest.” And that my friends is how a weekend of all the time in the world begins…
But so many times those blissfully hopeful weekends end with half-completed projects strewn about the house or garage with frustration and exhaustion mixed in among the tools, hot glue strings, trash and countless other things that were neglected as you attempt to just finish this one thing before you have to return to work the next day.
Obviously, I’m speaking from a purely hypothetical experience. Not once have I ever started 6 different projects in a weekend and not have the supplies or time to finish any of them and nearly driven myself to a nervous breakdown when I had to return to my normal schedule on Monday with half the contents of my kitchen drawers splayed on the kitchen table because I had yet to find organizers that would fit in said drawers. Nope, not me, just guessing that this happens to people.
So how do “people” avoid this trap of the DIY weekend? I think there are 3 main steps to being prepared for the weekend project(s).
1) Make a Plan
This sounds ridiculous, but so many times projects start with an inspiration over Saturday morning coffee without much more thought put in to what’s next. Whether it’s a day, weekend or week before you begin your project, you need to figure out what is your general plan. For example, this weekend, we are reorganizing our garage. (A necessity after everything was shoved in one corner during the installation of our storm shelter!) Here’s what we’re dealing with right now:
First, I figured out what storage pieces I wanted to keep and what kind I wanted to get so I would know the skeleton of what I was working with as I started purchasing items. I have taken a general stock of what’s in the garage knowing some things will be thrown out, some will stay and some will be reduced. I have taking pictures on my phone so as I have shopped I know what I have that I will be organizing – what tools, what toys, etc. I took measurements of the shelves so that I would know what storage containers would fit and if more than one would fit on a shelf together. Have a plan!
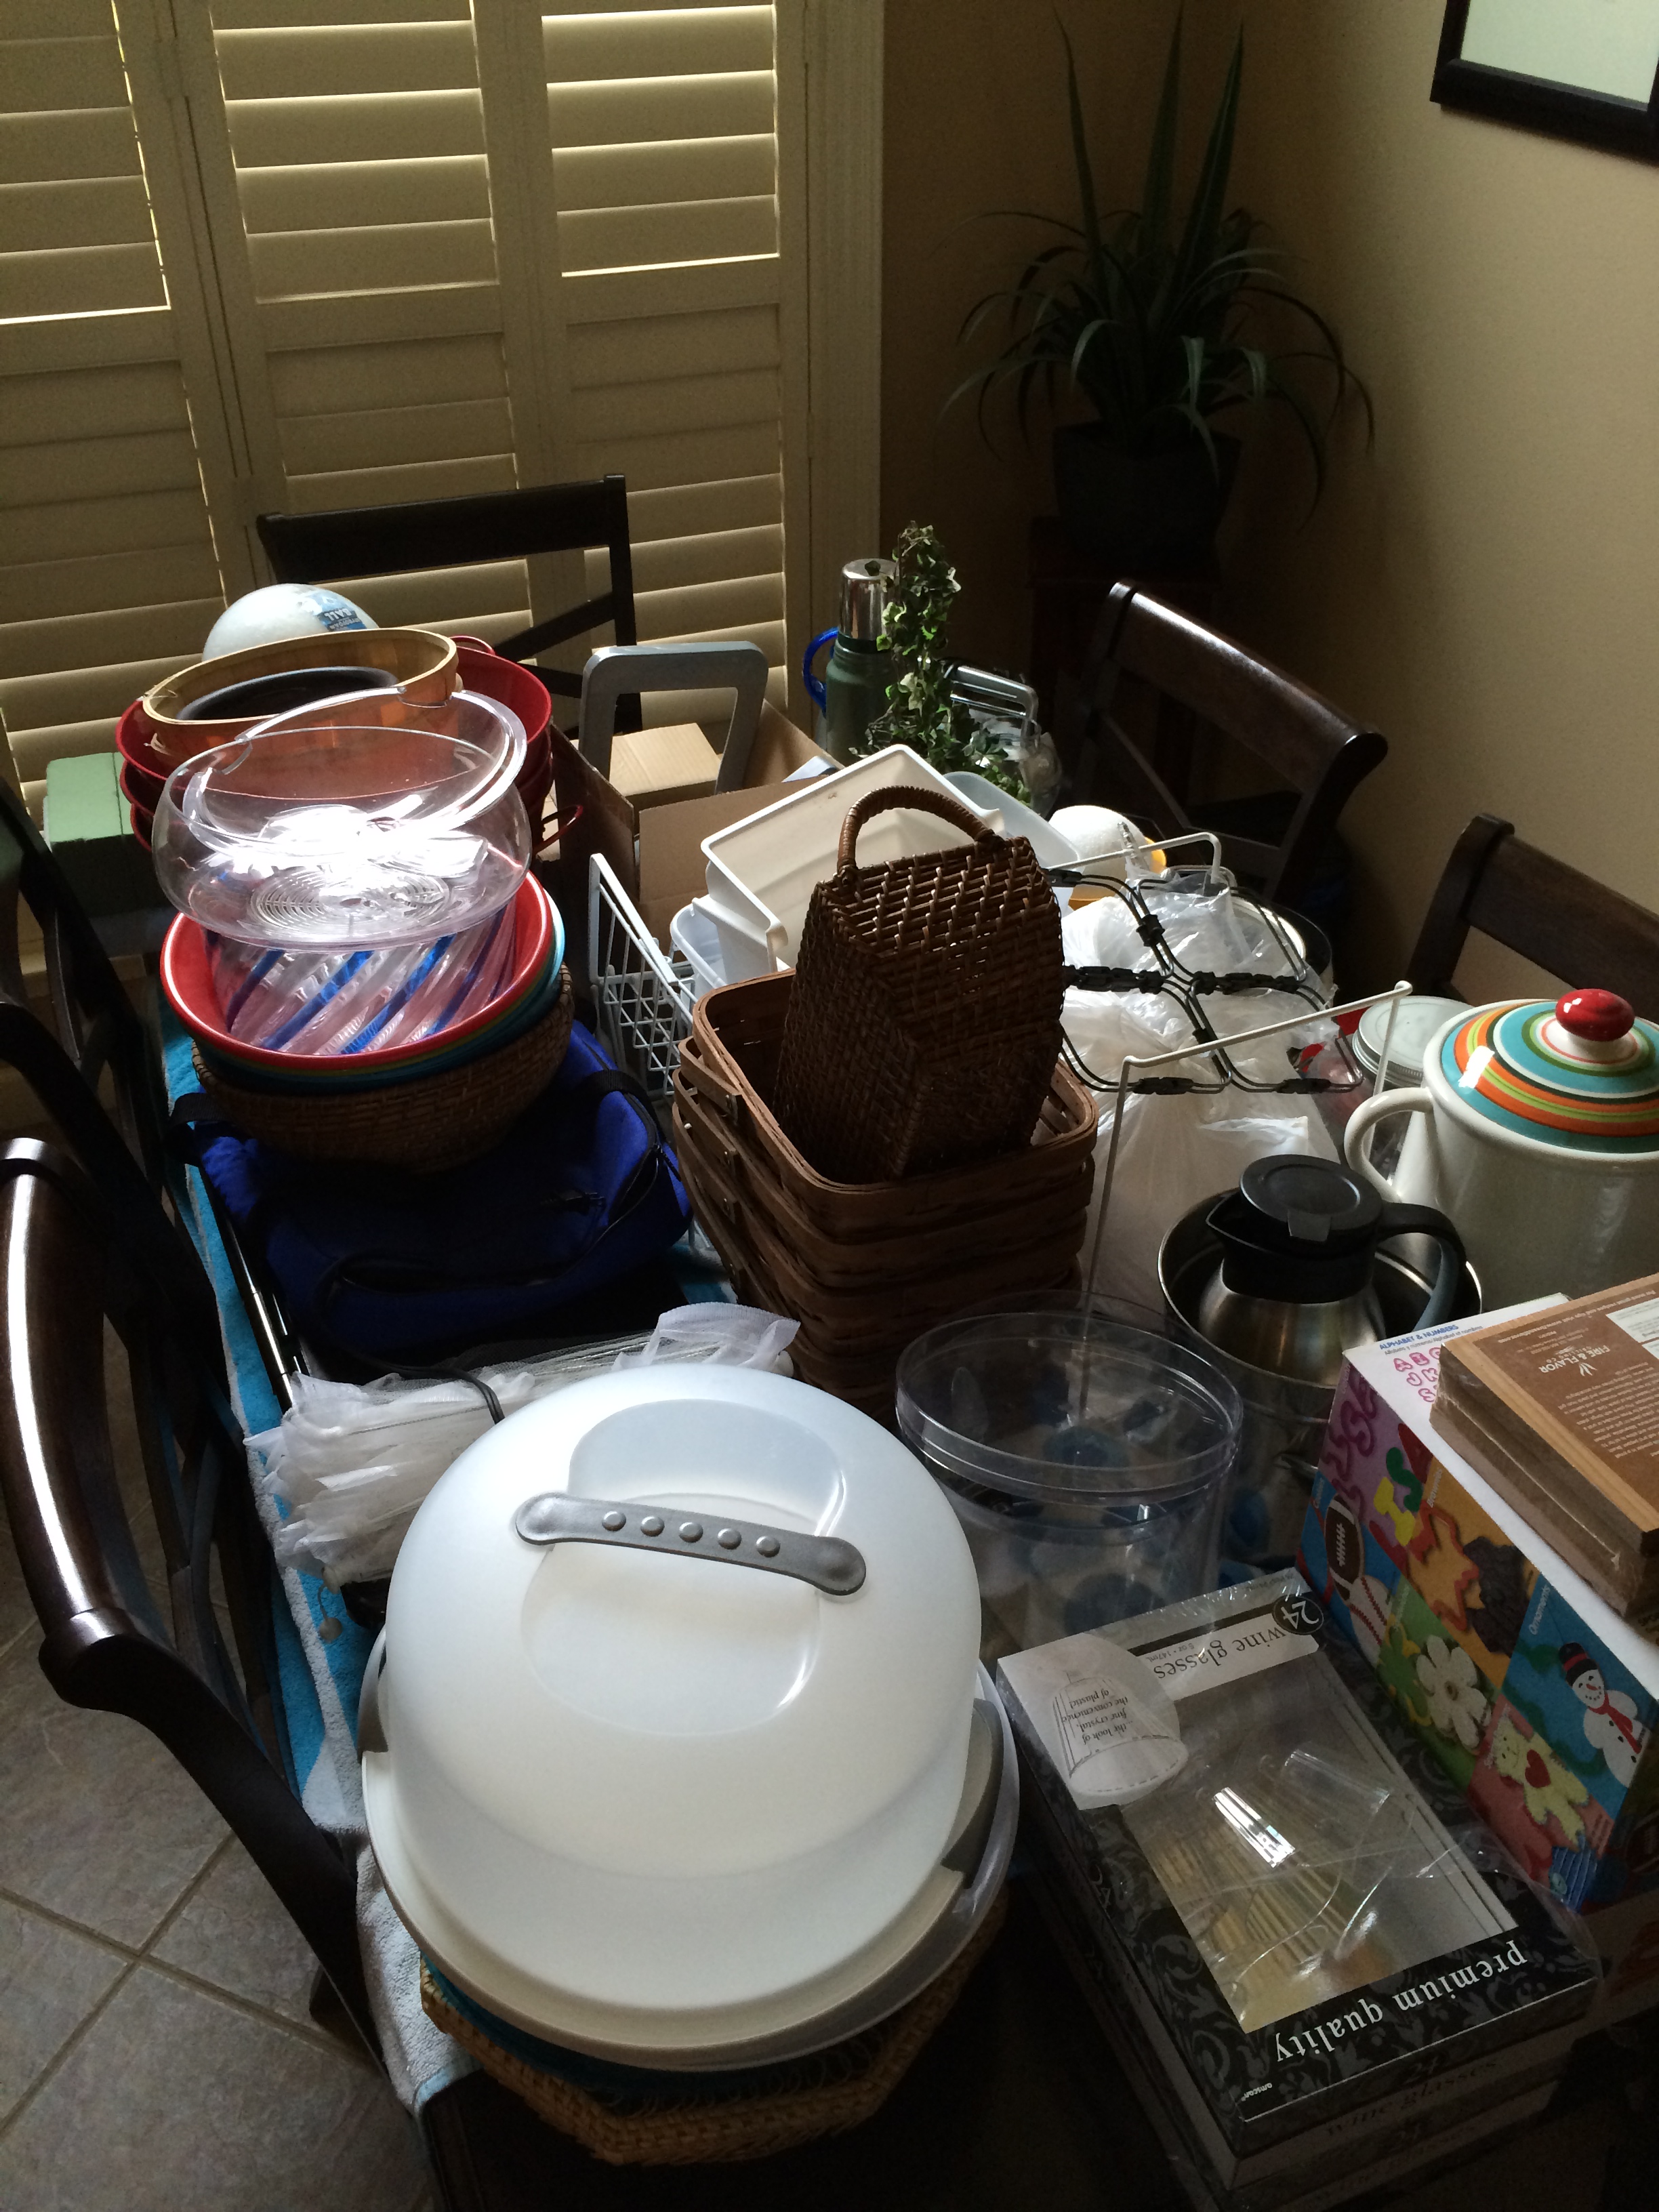
And here’s everything from the storage piece that we got rid of and will be transferring to new shelving, making a lovely home on my dining room table right now:
2) Over Buy
As you shop to get prepared for your project be sure to find a store that allows you to bring back unused products and over buy. This will save you time as you organize, build, clean, etc. Use what you need so you can complete the project in one time setting. Then, return the unused items either that weekend or later the next week. This saves you from losing motivation, getting distracted and from losing time on unnecessary trips to the store. Right now I own about twice as many storage boxes as I will need in various sizes and shapes. However, I will be able to organize all that stuff on my dining room table without stopping because I have options. Then, next week I’ll just easily return what I didn’t need.

3) Evaluate Time vs Money
In the day and age of Pinterest we can get caught up in the idea of DIY. While creating something from nothing can be rewarding, it can also be something we end up investing way more time and/or money than it’s actually worth to us. So, as you begin planning your projects ask yourself why you want to do them. Are they just for practical purposes? Or will the creative work bring value to them for you? Will the work you invest in them truly be saving you money or could you purchase a completed item for about the same amount? Some projects are worth the effort, others are just a headache and would end up on the Pinterest fail website if the right people saw them.
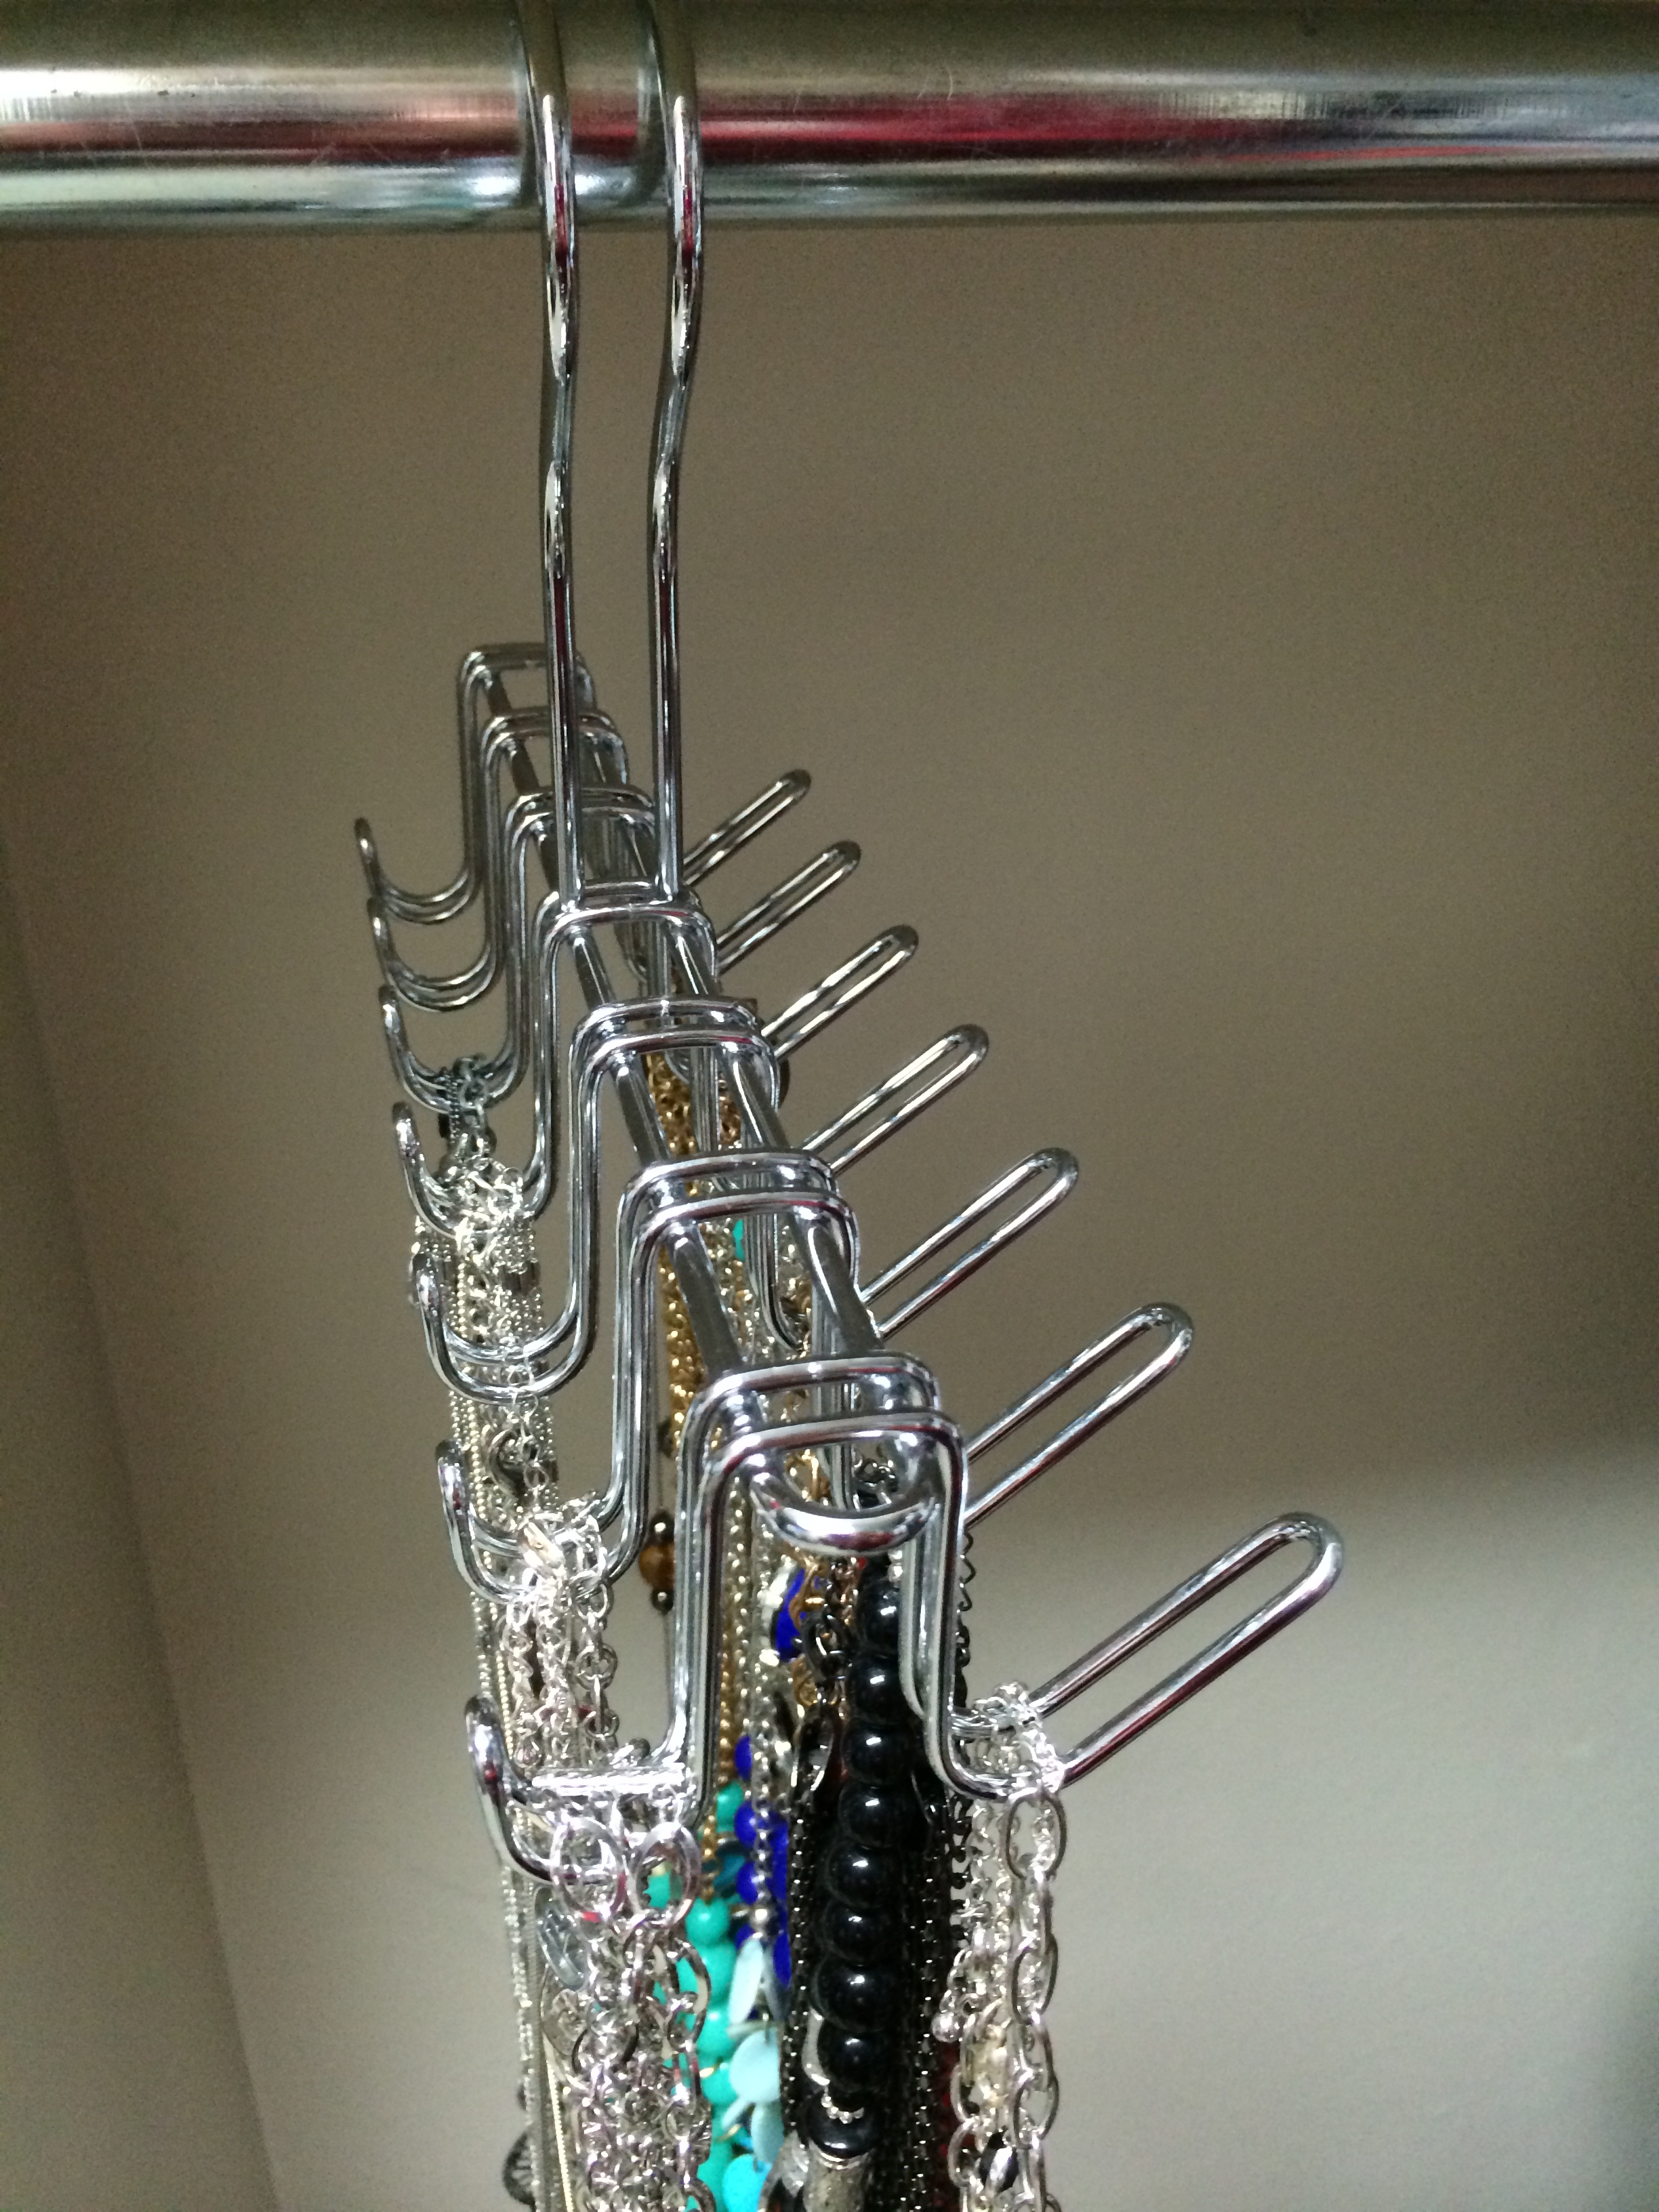
I’ll give you an example of how I used this step myself recently. I have always kept all my necklaces on one large hoop that hung on a single hanger in my closet. It did the trick to keep my necklaces untangled most of the time but it was hard to see them all and I ended up forgetting about most of the ones towards the back because they stayed covered up. So, I decided that I wanted to reorganize my necklaces. First, I laid themout by design and color to see what I was looking at as far as number of hooks, etc. Then, I got on Pinterest and started investigating how to go about making something of my own. There were some great ideas, but the issue for me was that I wasn’t looking for a whole lot of frills, I just needs something simple to hang my necklaces on that didn’t take up much space and didn’t take a lot of time or money to make. Then, I decided to look at Amazon to see what they had. After a few word searches, I came upon this belt and tie hook for $7.99. It’s exactly what I had in my head and it was cheaper than any of the supplies I was going to have to purchase for the projects I had just spent 30 minutes looking at on Pinterest. It’s working beautifully to keep my necklaces organized by color and design and I spent less than 30 minutes unpacking it, sorting necklaces, and hanging them up!