Managing Time & Avoiding “Shoulda, Coulda, Woulda”

Time!  There’s never enough of it and when we do have it we seem to find ourselves spinning in circles figuring out which task on the never ending list to do first.

Part of being organized is simply about knowing how to manage your time so that you can get the most done in the time that you do have.  I strongly believe that we sometimes sabotage ourselves to keep from being more productive in fear that we won’t know what to do if we actually aren’t as busy as we’re made to believe we should be.  Or that we won’t be able to compare ourselves to all the other “busy” people we interact with in our daily lives.  But you know what?  We need to get out of that mindset right now, and tell ourselves that we’re going to figure out how to get our crap done when it’s supposed to get done!  Then, we’re going to enjoy our family time, our alone time and stop constantly thinking about what we “should” be doing.  AND, even better, we’re going to celebrate by actually enjoying the downtime we do have without experiencing the guilt of “shoulda, coulda, woulda” in our pajamas with a glass of wine or chocolate.  Or both – no judgment here.

So, how do we get to a place where we say the day’s work is actually done…and actually feel as though it was productive?  Here are a few things that you’ll need to do to get started:

  • Start figuring out where your time goes during the day. Track your time for the next week.  Keep a spreadsheet or a notebook and write down blocks of time and what you did during those blocks of time.  You don’t need to waste time being too detailed, but keep up with when you spent time on actual work projects, checking email, phone calls, in meetings, etc.  Then, also write down when chunks of time where taken up by non-related work events such as co-workers’ visits, helping restock toilet paper in the bathroom (true story), etc.  This will quickly help you realize where your time is going when you feel like you’ve worked all day but you’re actually not spending it all on “work.”
  • Identify your “timesucker(s).” This is when it’s time to be brutally honest with yourself.  What is your distraction that you turn to when you don’t want to start the next project or when you “only have 20 minutes” left of the day?  Is it facebook, candy crush, solitaire, chatting with co-workers, scavenging for food in the work room?  Be honest…what do you do when you’re avoiding working?

Now that you’ve done some self-examination, here are some simple changes that can quickly help make your day more productive and will help you get the most out of your time:

  • Using what you discover using your time log, come up with a general game plan for your days’ schedule. Each day may look different if you have meetings scheduled but you should have a plan for when you’ll be at your desk and when you’ll be up and around the office.  If you are most productive in the mornings, you need to be at your desk in the mornings.  Tell yourself that your “visiting” half hour can wait until the afternoon when you need a little energy and then do all of your stops at once so you don’t spend more time than needed going back and forth to your office.  Set an alarm on your phone to keep you on track.  Or that your second cup of coffee doesn’t come until after emails are caught up so that you don’t set yourself up to be in the workroom for an extra half hour before you’ve accomplished anything in the day yet.
  • Set a plan for yourself for how to use your timesucker. For example, you can set a reward for yourself that you can get on facebook for 10 minutes (again, set an alarm) once the most important project of the day is completed.   If you are distracted by facebook or other websites, there is a website called focalfilter.com that allows you to temporarily block yourself from websites.  You can set the time limit and the sites so it’s an extra reminder that you’re supposed to be getting that project done first!  If your timesucker is something more like a chatty coworker or just getting generally distracted on a number of things, set an alarm on your phone every hour at 10 minutes to the hour.  It will be a regular reminder to stay on track and will give you a way to excuse yourself to an imaginary meeting or conference call if you’re in a conversation that should have ended 15 minutes ago.
  • Many times we like to feel productive by doing the easiest, quickest things on our list first. However, if you’ll pick the two hardest or most time consuming things to get done first then the rest of the day will be much easier, more productive and you won’t have the big projects looming all day.  If you get distracted easily, you can use http://inboxpause.com/ to temporarily pause your incoming emails until you finish the project so that you don’t feel like you have to stop working on your project to answer them. If you don’t have gmail, just close your inbox.  It won’t hurt them to not be seen for just a few hours while you concentrate on finishing one thing from start to finish!
  • One of the best ways to be productive is to have a plan when you walk in the door in the morning rather than spending the first 30 minutes figuring out what you have to do that day. This can easily be accomplished if you follow my guidelines of cleaning your desk, to do list and inbox at the end of each day.  You can find out more about how to end each day so that tomorrow is more productive in these 3 posts:

There’s No Stress in a Clean Desk: Simple Steps to Getting and Keeping a Clean Desk

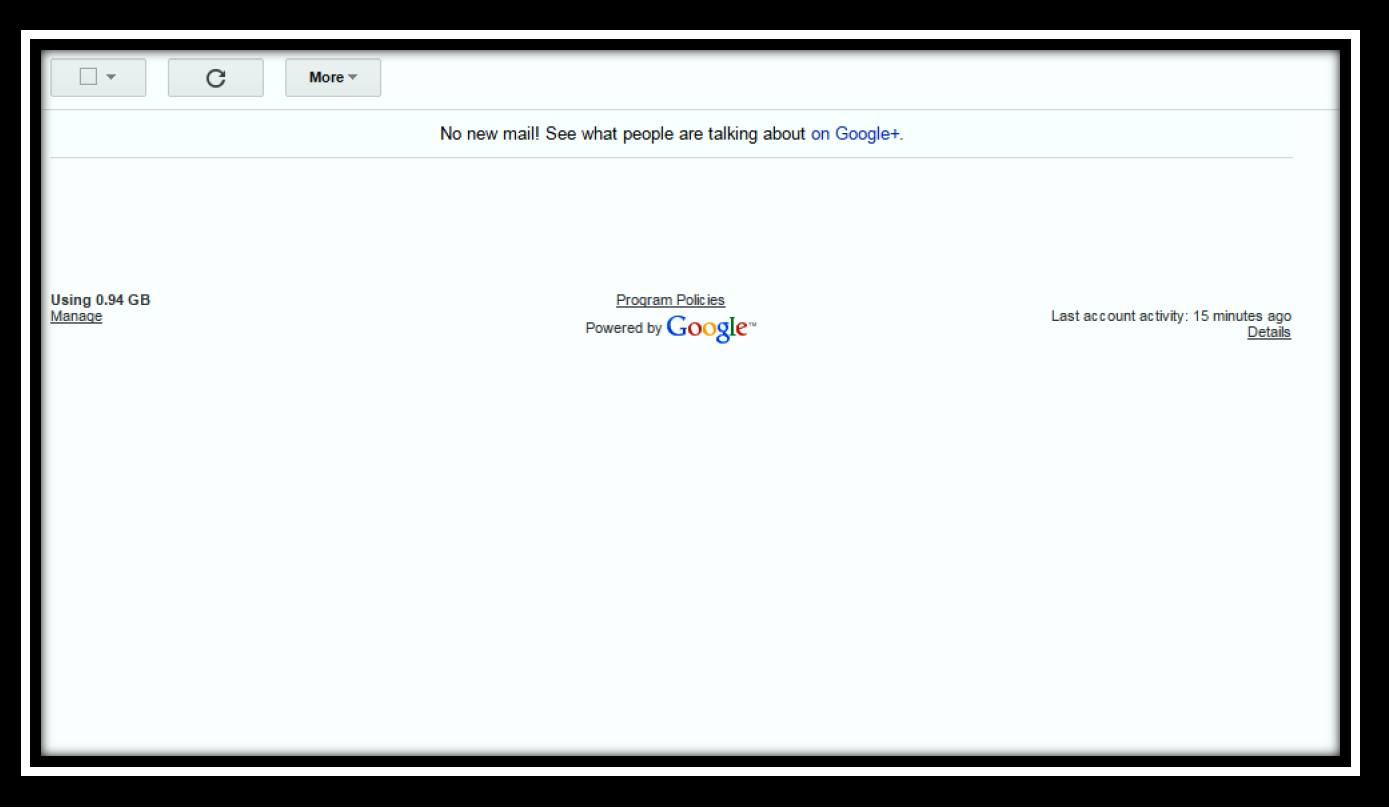
You’ve Got…No…Mail: Simple Steps to Getting and Keeping a Clear Inbox

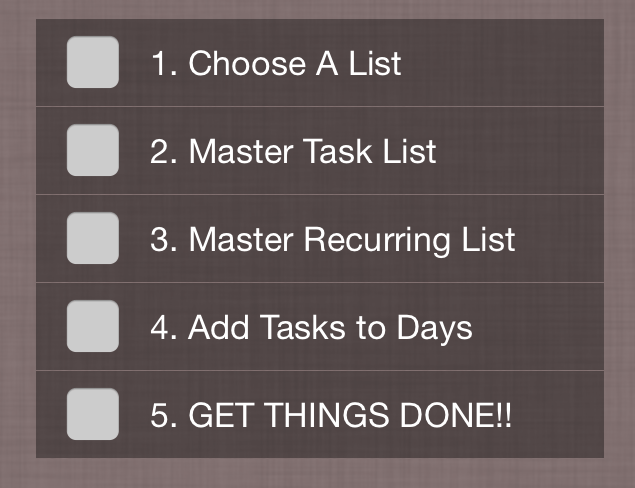
Much To Do about Something: How to Create and Manage a To Do List That Actually Works


Much TO-DO About Something

Much TO-DO About Something

How to Create and Manage a To-Do List That Actually Works

The ol’ to-do list, task list, agenda, and so on.  Whatever your name for the one you use, it’s one of the most important items to keep you on track and productive.  But what’s the point of keeping a list of any kind if you just keep adding to it, perpetually re-writing it without every making actual progress, or continuing to forget to do things?  By creating a to-do list and actually learning how to use it you can increase your productivity and be sure that you are accomplishing tasks on time which helps develop your credibility.

I use to do lists in both my work life and my home life.  They look different for both because I have different needs for those worlds.  I’ll be writing about how I make and manage my to-do list for my home life next week, but some of the things I share here will apply and carry over.

  1. The first step of a good to-do list is choosing the best actual way to keep your list. There are a variety of ways to keep a list.  I’m a big fan of an electronic list.  Paper lists can cause trouble – they can get lost, get ruined by spilled drinks/food, they get messy and you waste time rewriting them, and they’re harder to use for long range planning/recurring tasks.  Do some research to find the best list for you.  My favorite is goodtodo.com.  I like it for a few reasons:
  • It is web based so I can access it anywhere but it has apps for the iphone and ipad so I can add things on my phone and it will sync easily. (They don’t have an app for androids yet unless that’s happened recently so be sure do research that before you get really excited about this one!)
  •  Photo Apr 08, 9 33 47 PMIt’s free, but for $3 a month it will allow you to keep unlimited categories. I use this since I have 4 different areas at work.  That way I can track what tasks I have to do in what areas.  I also keep a personal category that helps me track tasks on a long term basis. (I’ll explain this in a later post.)
  • It lets you set up recurring tasks for every day, every week, every month, every year, etc.
  • It allows you to add a task to your to do by forwarding an email directly to it. Check out the about section and watch the video for more details about this feature.  It’s really neat and will help you keep that inbox clean (read why I think that’s important and how to do it here).

There are lots of other online to-do lists that have similar features.  Some others (among many more) are www.wunderlist.com, www.rememberthemilk.com, www.toodledo.com.  You need to do your own research and find the one that works for how you work.  Make sure the “look” works for you, the features do what you need them to do for what you do and then make a commitment.

  1. The second step of a good to-do list is creating a master task list. This is daunting and will probably make you want to throw up.  It’s okay, don’t feel like you have to do this all at once.  And know that every time I’ve shared this step with people the first reaction is an audible groan, the next is their eyes bugging out and then comes acceptance.  (I think they still say bad things about me as they make their lists, but that’s okay, it will be worth it!)  The master task list should include absolutely everything you can think of that you know that you have to do in the next 3 months – at least.    If you already have projects or events on the calendar past 3 months, then at the end of the 3 months one of your tasks needs to be “brainstorms tasks for next 3 months” so you can be sure to stay ahead of the game as you get this process under control.
  1. The third step of a good to-do list is making a master list of recurring tasks. Any tasks that happen on a regular basis – daily, weekly, monthly or yearly.  For example, if you put out a newsletter at the first of every month, then I would suggest that a recurring task “work on next month’s newsletter” is set up for the 25th of each month.
  1. The fourth step of a good to-do list is then assigning the items from your master task lists to actual days on your new to-do list. One of the mistakes I think people make is that they try to keep one master list and just work off of that all the time.  Instead, you should have tasks assigned to the day of the week that they need to be done and so you really end up creating smaller to-do lists that are actually manageable.   A few things to keep in mind as you complete this step:
  • You should always look at your calendar as you set up your to-do list. Assign tasks that you will have time to get accomplished during the time you that day.  For example, if you have meetings scheduled most of the day, don’t expect to get 20 things accomplished that day also.
  • Try to have a mix of small, administrative tasks and larger, more time consuming tasks each day. This will ensure that something will get accomplished every day, even if something comes up and you only have a little bit of time.

Now that your to-do list is set up, it’s all about maintaining it so that you can truly use it and be as productive as possible.  Here are a few tips to keep it mind as you begin to use it and learn to work the system:

  • Spend a little time at the end of each week looking at the next week’s calendar and the next week’s to-do lists to be sure that the days’ tasks still work with the days’ schedules. Rearrange and move around tasks before you start your week so you don’t start by being overwhelmed on Monday morning.
  • On a similar note, as I noted in the previous two posts in the Office category about keeping your desk and your inbox clean, you should also keep your to-do list clean. At the end of each day as you clear your desk and your inbox, you should then go through anything left on your to-do list for the day (if there is anything) and move the tasks to either the next day or to another day to be accomplished.  Many electronic to-do lists will just automatically roll over any unchecked tasks.  However, if you allow this without looking to see if you can really accomplish what’s left on today’s list according to what’s on the calendar for tomorrow you run the risk of allowing too many things to just continue to stack on to one day and become overwhelming.
  • Add anything unexpected that you did during your day that wasn’t originally on your list to your list and then check it off. This sounds ridiculous, but it’s important to keep up with what you did during the day, even if it’s not what you planned to do.  This can come in handy when you’re trying to track when something got finished (perhaps if your boss asks?!) and is just a general way to know where your time went for the day.
  • When in doubt, put it on the list. I say this because I think many people make the mistake of only putting the “big stuff” on their list assuming that they’ll just remember the other stuff or that it will just happen.  That’s how details get forgotten.  An example: any time I put a meeting on my calendar, I automatically put “put tasks from blah blah meeting minutes on to-do list.”  This way, I automatically have a follow up in place even if I don’t have details yet. Even if I don’t end up having any action items after a meeting, I can just take that item off my list but at least I knew that it was there as a safety net to remind me to follow up quickly after the meeting.

The key to a good to-do list is actually working this list.  You have to keep up with it on a daily basis, add to it, check items off and keep up with how it’s working with your schedule.  Keeping your expectations reasonable on a daily basis with smaller lists rather than working off a huge list will help you from feeling overwhelmed and as if you don’t even know where to start!

Good luck and I’d love to hear what to-do list you decide to use!


You’ve Got…NO…Mail!

You’ve Got…NO…Mail!

Simple Steps to Getting and Keeping a Clear Inbox

While not everyone can see our inbox like they can see our desk, it is just as important to keep our inbox clean Too much mailand organized on a daily basis.  Making this a priority keeps us from missing information, helps us answer emails promptly and keeps our anxiety level down because we know we have actually addressed everything that has come across our virtual desk for the day.  It also keeps that obnoxious red bubble on our phone from showing up.  I hate that thing, seriously. (For the record, this is a picture one of my friend’s sent me to make my eye twitch, I’m not sure if my bubble has ever even seen double digits!)

As I stated in my post “There’s no stress in a clean desk” I believe that there are 3 steps that you must follow each day to keep an organized work area.  When I say “clean” I mean that at the end of every day, these three areas are cleared, double checked, and ready for the next day.  These areas are your desk, your to-do list and your inbox.  Today, we’ll tackle step 2 of 3, your inbox.

Getting and keeping your inbox clean is actually very similar to the steps to cleaning your desks – it requires lots of folders!  Let’s get started.

How to get your inbox clear the FIRST time:

  • This process will depend on how many emails are sitting in your inbox right now. This might take a day of staring at the computer or it might take several days of working through emails while watching tv after the kids are in bed.  However, you do it, MAKE A PLAN.  Set a deadline for yourself, get your total number, then set a goal for how many you have to sort through a day to finish by your deadline. And add that task to your to do list each day until your inbox is completely clear.
  • It’s sometimes easier to clear out at night when new emails are slower to come in to your inbox. Another trick that you might you use to keep from being distracted or to keep from accidentally deleting new emails if you’re deleting several at a time is to use inboxpause.com.  This website allows you to pause your new emails from showing up in your inbox, then to unpause them when you’re ready to see them again.  (It’s also a handy tool when you’re working on a project and need to keep from being distracteFor Newsletterd.)
  • Follow UpCreate a folder called “Follow Up.” This folder will be used just as the “Follow Up” folder on your desk should.  It will be a place for emails that need to be answered and don’t need to be “filed” away to a permanent file yet.  IMPORTANT: When you put an email in the follow up folder, you should put that item on your to do list to be sure the email gets answered and not forgotten.  For example, if I am waiting to find out a piece of information for party A I will file her email in the “Follow Up” folder until I get the information I need.  But when I move the email to the “Follow Up” folder, I add to my to do list for tomorrow, “Answer Party A’s email about Blah Blah.”  In addition, I answer Party A’s email saying I will follow up with her tomorrow with the answer so that she knows I haven’t forgotten her and so she knows when to expect an answer.
  • Also create folders for anything you have to hold on to for regularly occurring projects.  For example, part of my job is to put out an email newsletter twice a month.  People send me emails with articles, ads, pictures, etc. to put in the newsletter.  As soon as I get an email with info for the next newsletter, I file it in the “For Newsletter” folder.  This way, when I’m working on the next newsletter, all the information I need for that edition is all in one place but it isn’t sitting in my inbox for 2 weeks and I don’t have to worry about forgetting something.
  • Delete the emails you no longer need. If you are deleting junk, take the time to unsubscribe to them also.  Unless you actually look at the information they send you, all you’re doing is setting your inbox up for more junk to arrive later.
  • As you continue to sort through emails, make any necessary folders and subfolders necessary to make emails easy to find. Be sure to put the year on trips or events that occur each year so it’s easier to sort.  One way to keep from having too many folders on the sidebar to sort through is to put all finished events of the year in a folder called “Past Events” or “Completed.”  Obviously, this will depend on your work area.  A ministry example: I would have an active folder for each mission trip for the upcoming year.  Then I have a folder called “Past Mission Trips.”  Once the mission trips for the summer were finished all the active mission trip folders are moved into the one “Past Mission Trips” folder.  I can still find them if needed, but since I won’t be working on them regularly I won’t have as much to sort through each day as I’m looking through folders.

How to keep your inbox clean EVERY day:

  • In the 15 minutes before you leave each day the ritual of cleaning the three areas – your desk, your to do list and your inbox, should begin.
  • Delete any junk emails, unsubscribe from any you don’t need to continue receiving.
  • You should answer any email that can be quickly addressed in about 30 seconds.
  • File any emails that need to be filed in existing folders.
  • Create any new folders if necessary and file emails in those folders.
  • Place any emails that cannot be addressed before you leave in your “Follow Up” folder and be sure to mark those tasks on your to do list for tomorrow. Be sure to respond to those emails letting the senders know when to expect a reply.


There’s No Stress in a Clean Desk

There’s No Stress in a Clean Desk

Simple Steps to Getting and Keeping a Clean Desk

Ah…work.  Whether it’s quarter-time, part-time, full-time or something in between it’s still just that…work!  And the more organized you can be at work the more productive you can be there which means you can do less work at home!  And let’s face it, now that you’re going to be getting all these fantastic tips on how to get organized at home too you’re going to want to have some time to get your stuff together there too.  You don’t have time to be catching up work at home…you have mail to check and cute baskets of goodies to make for the next baby shower!  (If you don’t know what I’m talking about be sure to get caught up in the Home and Kids categories after you finish here.)

So how do you stay organized at work?  Well, that’s way more complicated than one post, so I’m going to lay out the basics.  I believe that there are three main areas that must stay “clean” in a work space.  Some people have different work spaces than others.  I’m going to talk from the experience of my workspace but you might have to adapt the ideas to your own.  When I say “clean” I mean that at the end of every day, these three areas are cleared, double checked, and ready for the next day.  These areas are your desk, your to-do list and your inbox.  Today, we’ll tackle your desk.

(Now, I’m going to just stop here and say that if you’re one of those people who want to quote one of those articles about how messy offices or spaces breed creativity and different people work different way that’s perfectly fine with me.  I will respectfully disagree with you and continue not to comprehend how anyone can function with piles and piles of stuff on their desk.  Not my thing, never will be. It makes my eye twitch.) Let’s carry on, shall we?

How to get your desk clean the FIRST time:

  • Before you get started you’ll need some file folders (I like different colors so I can categorize within my drawers), some drawer organizers for office supplies, and a file organizer for the top of your desk.
  • Clean out all the drawers – put all office supplies such as stapler, pens, paper clips, scissors, etc. together
  • Stack all folders that already have paper in them in one pile and all loose paper in a separate pile
  • Once everything is out of the desk, clean it really well…I mean when are you really going to have your desk that empty again?
  • Put your office supplies back in your drawers using your drawer organizers
  • Now, go through all the folders that already have paper in them and throw away any papers that you no longer need
  • Lay out all the folders on a table or the floor (sweep the floor if you need to before you do this, no need to put dirt back into a clean desk!)
  • Put the loose papers in the folders to which they belong, if you come to a paper that doesn’t have a folder get one of the new folders and make a new one right then, add it to the table or floor and keep going until there are no loose papers
  • Photo Jan 07, 5 11 42 PMPut all the folders back in your desk, organized either alphabetically or by color
  • Place the file organizer on top of your desk and put only the files of projects that are coming up in the next month or two in the organizer so they are easily accessible
  • Take one more folder (I like the color red for “Important”) and label it “To Do” or “Follow Up’
  • Congrats! You cleaned your desk!


How to keep your desk clean EVERY day:

  • In the 15 minutes before you leave each day the ritual of cleaning the three areas – your desk, your to do list and your inbox, should begin
  • You should go through anything left on your desk and find its place either in a desk drawer, in someone else’s office, a file folder, etc.
  • A key to maintaining a clean desk is keeping empty file folders on hand so that any time there are papers that need a new folder you have one and don’t have a reason to just make a pile until you get a new folder
  • If there’s a piece of paper that you need in order to finish something later in the week or that’s not ready to be filed yet, that’s when you use your “To Do” or “Follow Up” folder in your file organizer– this will help keep loose papers off your desk but keep them from getting lost all together