Oh SNAP! A Meal Plan with Meaning

One of the funniest memes I’ve seen over the past few months as I’ve scrolled through Facebook depicts a woman dramatically wailing into her hands and asking the question, “Why do they want dinner every single night?!”  Several months ago, I laughed to myself when I first read this sarcastic assessment of the stress of meal planning and preparing.  Now, I read it with a different perspective and appreciation.  What a privilege it is to expect a meal every night (and 2 others during the day.)  And how unfair that there are children – 200,000 just in Arkansas – who don’t have this expectation because they don’t know from where their next meal will be coming.

In June, I was challenged along with some coworkers to participate in what’s called the SNAP (Supplemental Nutrition Assistance Program) challenge for one week some time during the month of September as part of Hunger Awareness Month.  The idea is to live on what someone who received SNAP assistance (formerly known as the Food Stamp program) would live on each day – $5.00.  So, if your family participates in the challenge together you have $5 per person per day to spend for one week.  This meant we had a total of $75 to spend on groceries without using anything already in our house besides spices and condiments.  Find out more about the SNAP Challenge.

The Prep

I will be honest that I dreaded and procrastinated preparing the meal plan and grocery list until I absolutely had to get it together before the trip to the grocery store.  To have to be so intentional and careful is time consuming and mentally exhausting.  While I thought I stressed about keeping our grocery bill down each month, I realized very quickly that I really have it quite easy still when it comes to shopping.  I meal plan, but get to choose menu items based on what I’m craving or what looks like a fun recipe to try.  I rarely stress about what kind of meat it calls for or if it calls for more expensive items like fresh produce.  I simply write down the items I need and go get them, hoping I stay in a range for the grand total but not having to put items back if I’m over.  I think this is what I was scared of the most…what if I didn’t estimate well enough and I had to put something back?  My heartrate went up and I felt my cheeks get red at just the thought – the thought – that someone may see me have to put something back because I was over my set total.  Man, talk about a punch to the gut. I’ve never realized the pride that’s wrapped into simple actions such as checking out in the grocery store line until this week.

My husband and I made a plan.  We’re used to have 2 large meals made at the beginning of the week and then alternating those back and forth for dinners.  Sometimes we take them as lunches too, but several days each week are spent eating out for lunch due to convenience or just wanting a particular dish from a particular place at a particular time…again, what a privilege.  We decided on Taco Soup, Tomato Soup with Grilled Cheese sandwiches and Breakfast for Dinner.  I supplemented with applesauce, lima beans, bananas and cantaloupe as the vegetables and fruits for our week because these are the four current favorites of our son. To save money, we decided to use ground turkey instead of beef in the Taco Soup (saving $2.00) – also healthier!  For the Breakfast meal we used Turkey bacon which is anywhere from $5.00-$8.00 cheaper than pork bacon.  This was not a change for us, however, because we actually prefer turkey bacon.  I also chose non-organic milk instead of organic which I’ve been buying since my son starting drinking milk, saving $3.06.  I also purchased the cheapest eggs available instead of the brown cage free that I regularly purchase which saved $0.99.  When I got to the bread aisle I noticed that a different brand of bread than my regular one was on sale for $0.53 less so I purchased a loaf of it instead.  My total came out to $58.36!  I was so surprised at how frugal I was apparently capable of being.  I did go back and account for the 5 k-cups my husband will use this week (one per day) and the 3 that I would probably use since I don’t drink coffee every day.  They average about $0.75 each so that brings the total to $64.36.  Buying store brand items, not buying anything not involved in the main meals of the week  (i.e. dessert, sodas, etc.), using coupons, substituting cheaper proteins or other items, and finding meals that make plenty of left overs are some great tips to make your money stretch as far as possible.

Here are the recipes I used:

      Photo Sep 22, 6 39 18 PM


Taco Soup:

1 lb ground turkey

1 can corn

1 can pinto beans

1 can black beans

1 can kidney beans

1 can rotel

1 can Mexican stewed tomatoes

1 packet or 3 tbsp of taco seasoning

1 packet or 3 tbsp of ranch dressingPhoto Sep 22, 7 06 00 PM

Cook the meat, adding the taco seasoning to it at the end.  Mix meat and all canned items together (without draining).  Stir in ranch seasoning.  Simmer on low to taste.  Serve with tortilla chips, sour cream and shredded cheese. (This is an easy soup to make the night before and then put in the crockpot to simmer all day.)


Photo Sep 22, 6 45 41 PM

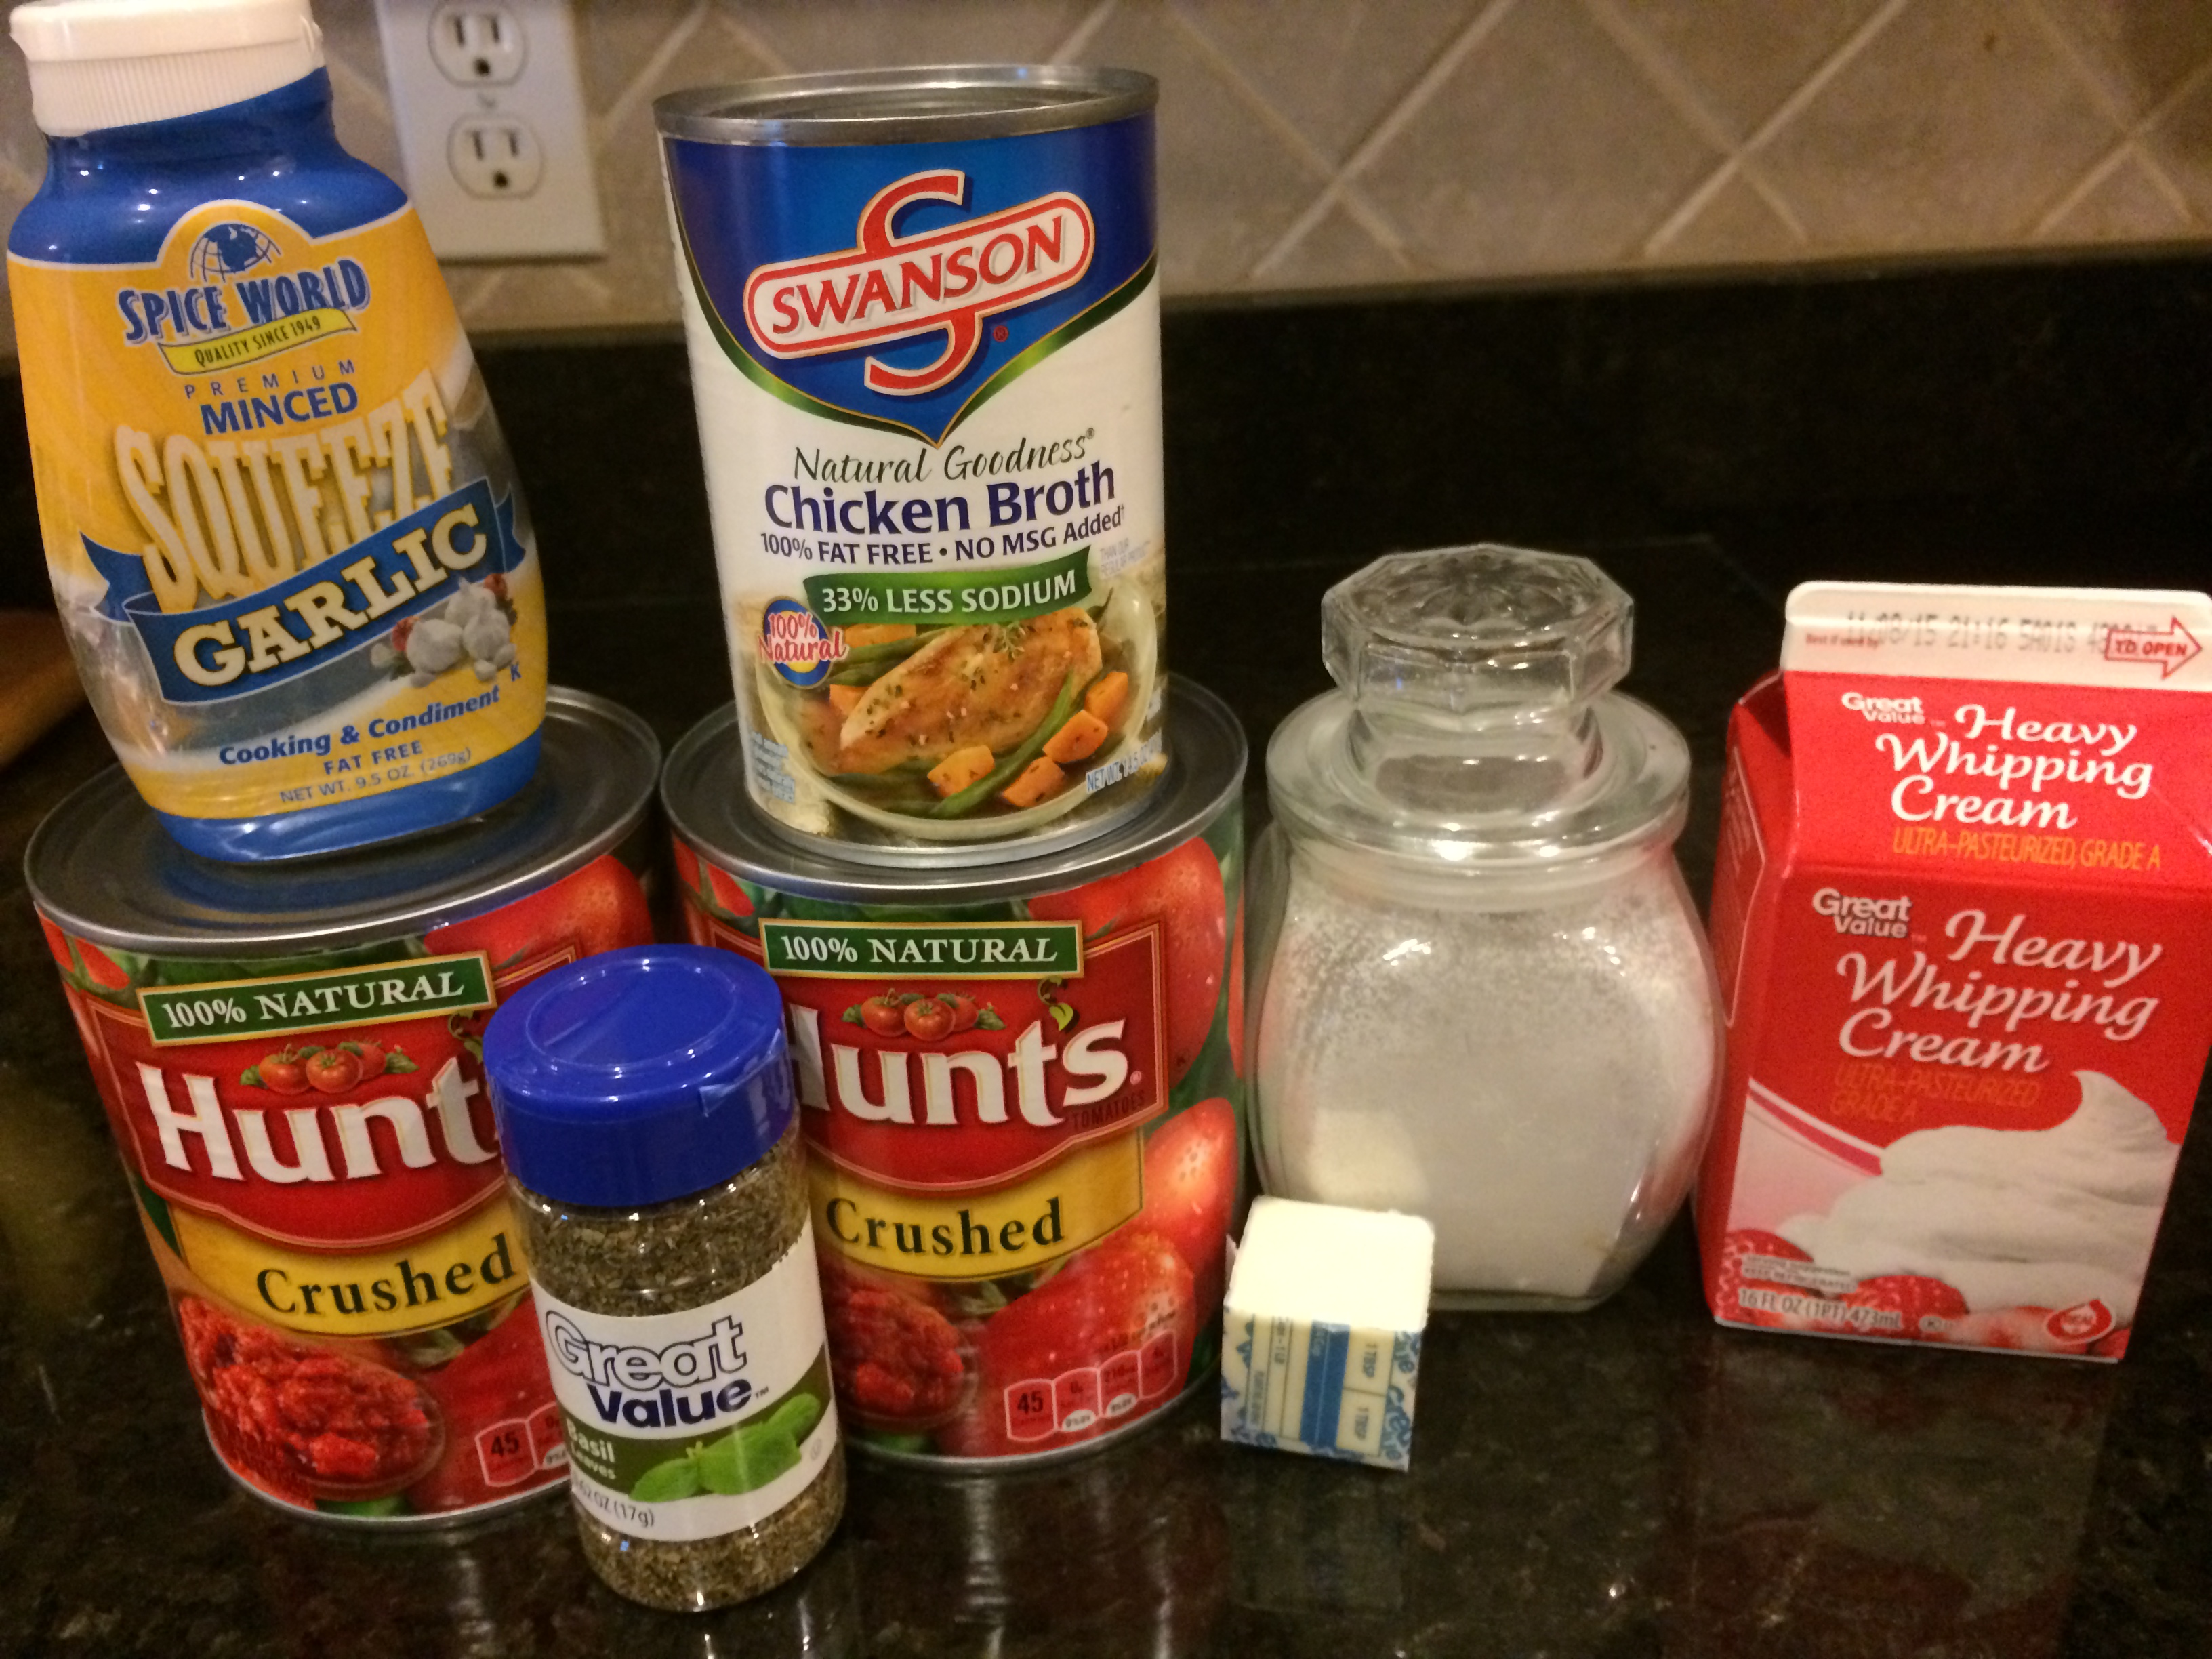
Tomato Soup (originally from The Pinning Mama):

2 28oz cans crushed tomatoes

1 tbsp crushed garlic

1 14 oz can chicken broth

2 tbsp sugar

1/3 cup butter

1 cup heavy cream

15-20 basic leaves, chopped or 2 tbsp dried chopped basil

Photo Sep 22, 7 16 29 PM
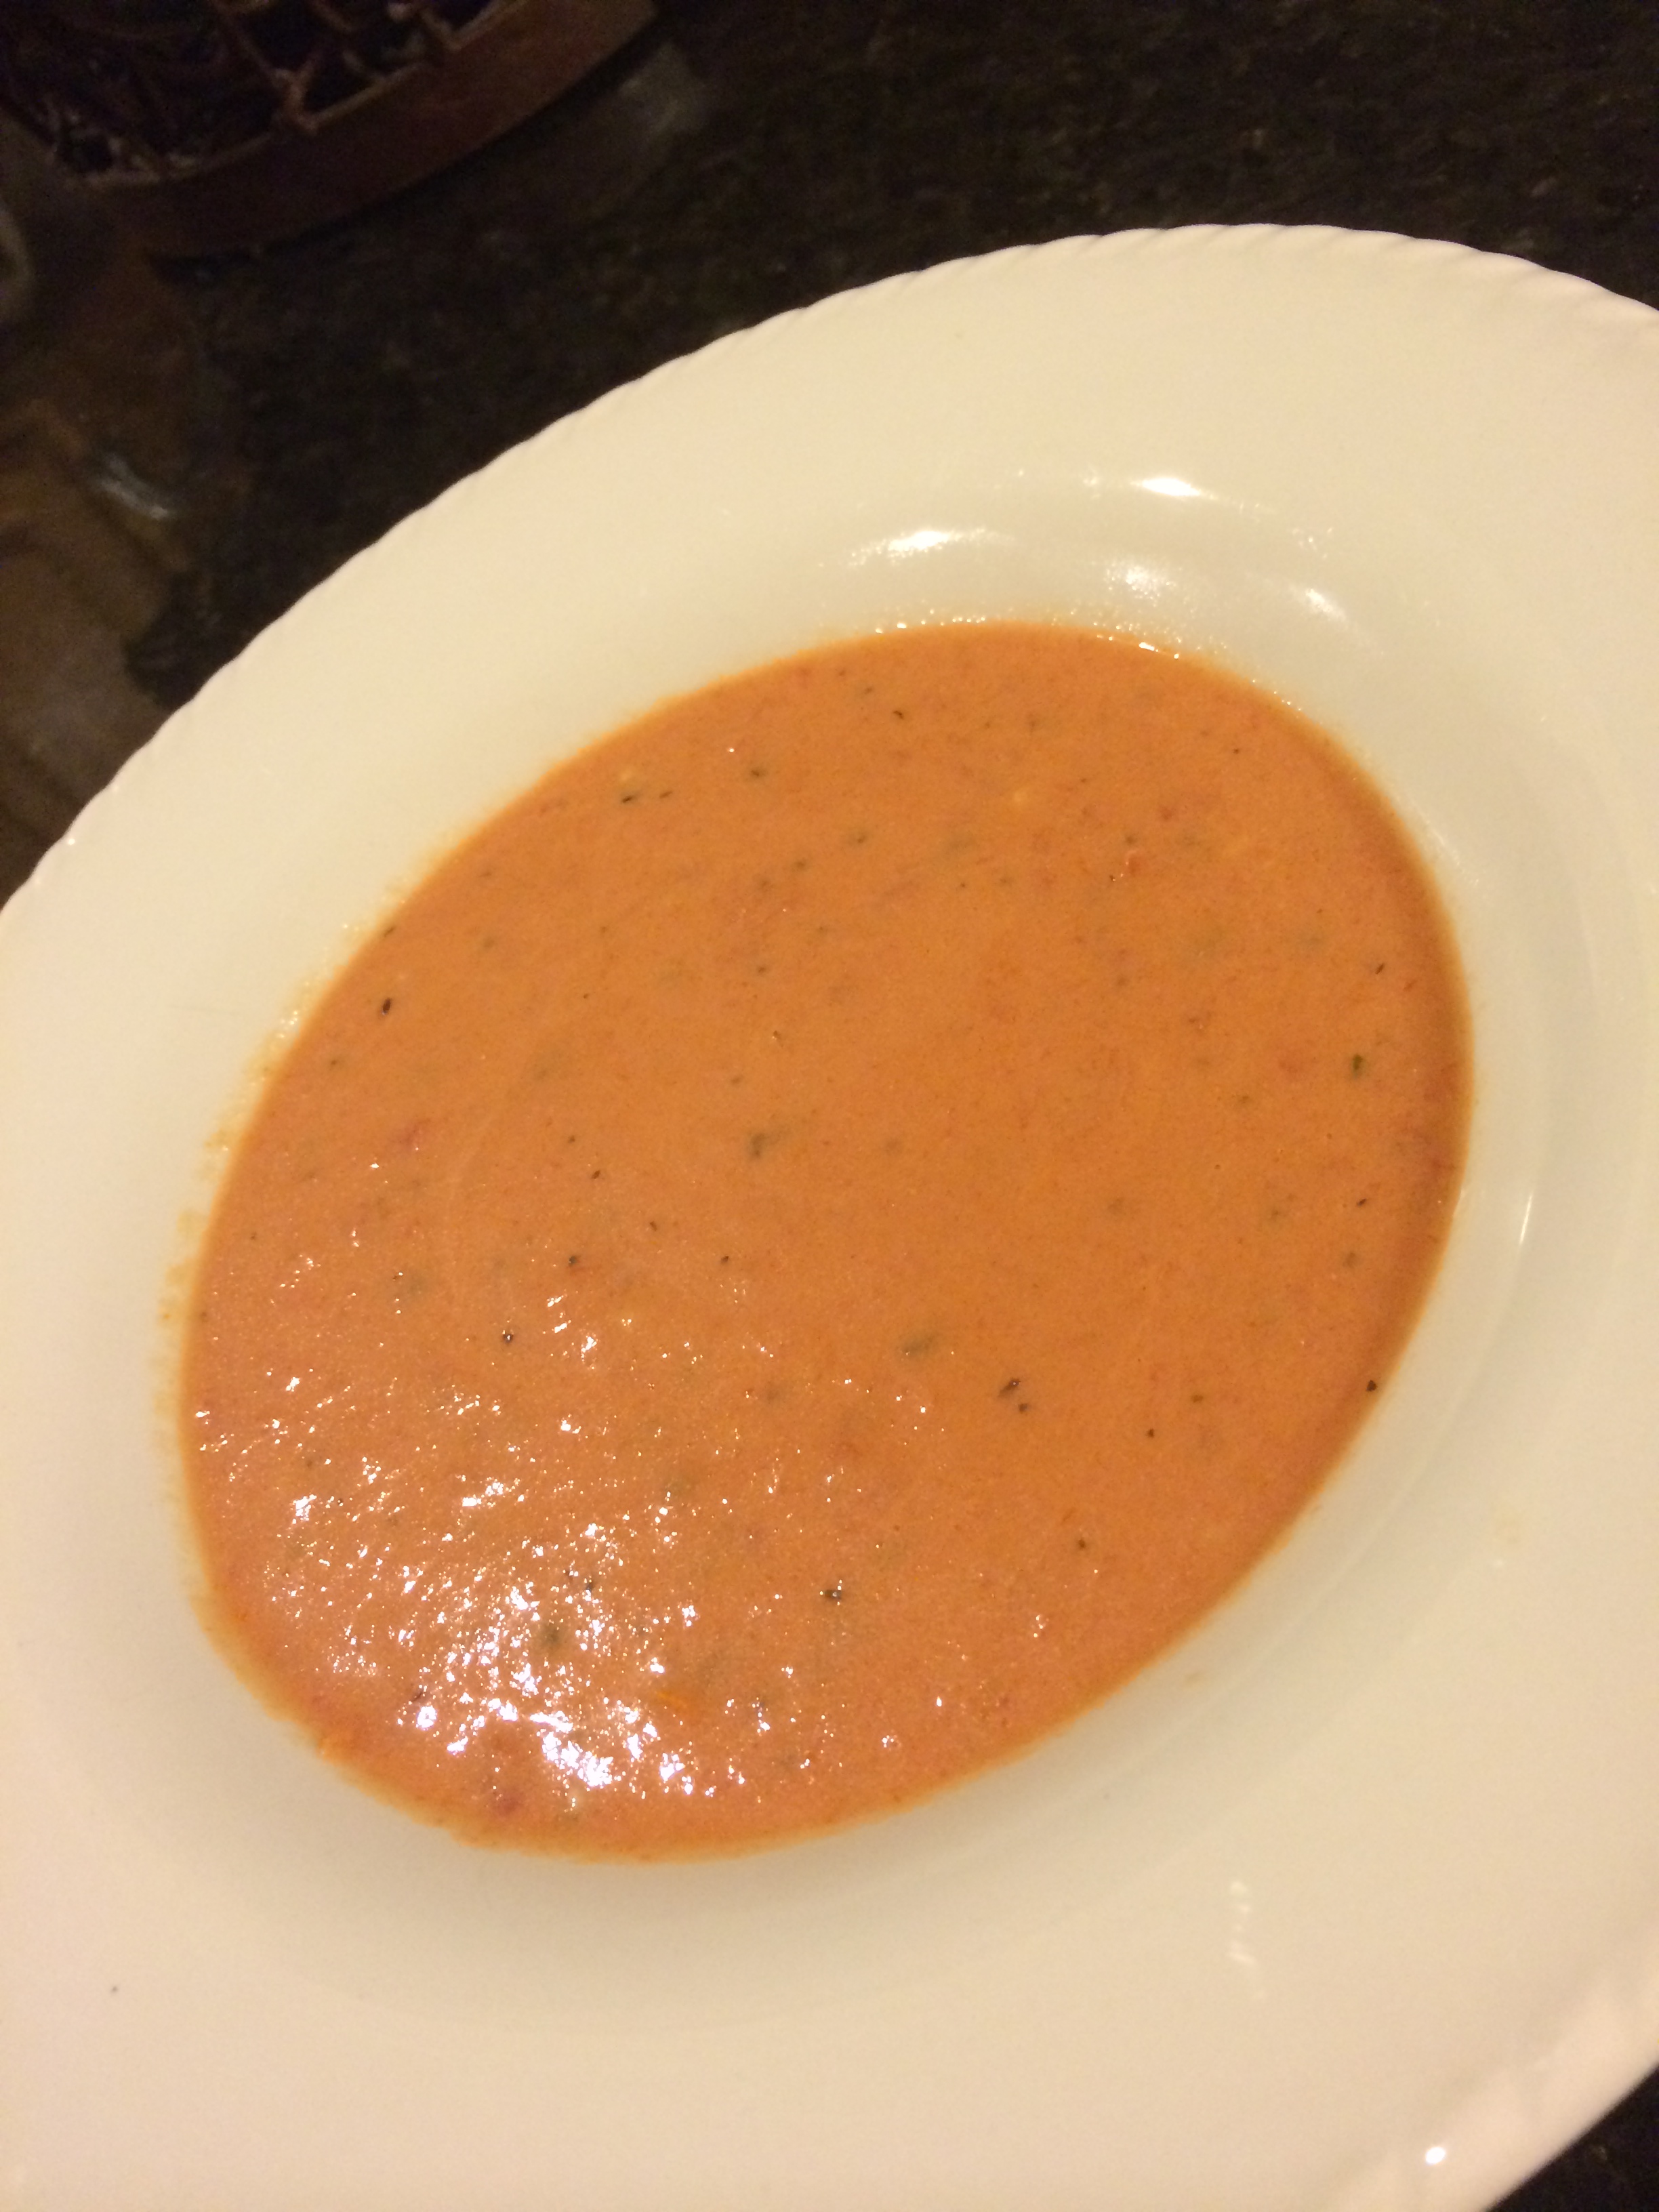
Combine tomatoes, garlic and broth and bring to a boil for 10 minutes.  Reduce the heat to low and stir in sugar and butter.  Mix until they are dissolved, meltePhoto Sep 22, 8 34 58 PMd and well combined. Very slowly pour in heavy cream while continuously stirring until all cream is combined and soup is creamy.  Stir in basil.  Good served with croutons, grilled cheese, or just a little parmesan cheese on top.

One pot of soup makes 5 meals for 2 people.  I freeze them by batch so they can be thawed quickly.


The Reflection

This challenge has definitely taught me a few things not only about Hunger Awareness in general but also about my attitude towards food and the role in plays in daily life.  Here are a few of the observations I’ve made so far, but I’m sure more are to come as I continue on the journey this week.

First, as I stated above, I have been struck by the amount of pride I feel when it comes to the ability to buy what I want, when I want it.  Having to be so careful with the threat of having a debit card not go through or not enough cash on a weekly or monthly basis would wear on my mental and emotional state in ways I’m not fully prepared to admit to myself.  I can’t begin to imagine the stress it causes for those who live this routine regularly.

Second, I had to make the conscience decision to not buy what I normally would for my family…this was most evident when it came to organic food and fresh produce.  I did pain-staking research when I became a parent to make myself feel most comfortable with what food to purchase and provide for my child.  Now, by no means do we eat all organic or not eat processed foods, but I had decided early on to make the switch to organic milk and eggs because I felt they were small changes in items that we consumed very regularly.  Having to decide not to provide that this week was another punch to my gut.  Cue the mom guilt.  I’ve been thinking about those parents who have to decide how to provide food in general, not the healthiest kind of it, for their children.  Bless their hearts.  Truly, bless their hearts.

Third, my husband and I have found that we both have jobs which provide opportunities to provide meals for us occasionally.  I tend to think that this is generally not the same situation for those who are working and having to use the SNAP program.  Just this week alone I will have 2 lunches provided – one because I was at a retreat for work and the other because I will be at a meeting over lunch.  My husband will have at least one lunch provided this week for similar reasons.  It’s quite convenient but this week has me wondering if we’re the ones who are in true need of free meal here and there as part of the hard work we put in at the workplace.

Fourth, there is no room for luxury or extras.  I did not have ice cream in the budget this week and therefore will not indulge is my 110 calorie cup as an afternoon snack.   I went to pour myself a glass of wine last night and was reminded by my husband that the bottle was not purchased this week with our budget money and was therefore off limits.  Seriously?!  The feeling of restriction quickly angered me.  But just a quickly the anger subsided.  Then, I wondered what real items are being sacrificed by families in order to just make it through to the next pay check?  While dessert and wine are very real to my middle class life and standards…I know much more is being missed out on, causing anger, sadness and resentment in families across our state and our country simply because they’ve had to say “no” yet again.

I’m so glad to have participated in this SNAP challenge.  I’ve done poverty simulations before as part of retreats and trainings.  But never before have I had to live in the situation.  The meals planned are not the focus here, as I assumed before I really got started.  Instead, the emotions, the inability, and the opportunities not available have shown themselves to me in ways I would never have realized by just reading about hunger or poverty situations.  It doesn’t stop with being aware.  I must find the best way to be in action.  I must do more to care for my neighbors as God calls me to do. My prayer is to continue to feel this “punched in the gut feeling” until the 200,000 children who are hungry in Arkansas can go to bed without their own “guts” growling.

Find out more about 200K Reasons by following the Initiative on Facebook.


Keeping Your Sanity While Traveling Part 1: Road Trip Countdown       

I’ve been traveling A LOT over the past few months both for business and with my family.  The first few trips were filled with too much luggage, dealing with a really anxious and restless 3 year old and a general feeling of exhaustion that seemed to set in before I had even left the house.  All these things started me to think that I had better get a handle on being a better traveler soon or I was going to lose my mind (and maybe some zippers on my precious overstuffed luggage!)

So I started googling the best ways to pack, space saving tricks and even ways to help my little man be a better (or at least more entertained) traveler.  So, in order to save you the time and trouble of all the research I had to do, I’ve condensed what I’ve learned over the summer about being a more organized, more compact, and at times more creative traveler into a few posts.  Today, I’ll share about a quick countdown that made our road trip to the beach way more fun and tangible for our son to understand.  Later I’ll share about how to pack a suitcase so that you can pack those extra pair of shoes and the “I just can’t decide” outfit and still not have to sit on it to make it shut.  And finally, I’ll share some checklists to help make every trip you take a breeze for which to pack.

The most dreaded question on a road trip with kids has to be, “ARE WE THERE YET?”  It seems to be uttered for the first time as the garage door closes and continues its shrill, taunting chant before we can even get the first DVD started.  I knew this was coming, especially after our first road trip in the spring with our son that was only about 5 hours seemed to double with his constant insistence that we were almost there in “3 more minutes, right momma?”   So as we approached the much longer drive to the beach vacation this summer I knew I had to find a way to give him a visual for how much longer it would be to our destination.  I did some pinterest searching and quickly found a reasonable project that I could handle in the 24 hours before we left – in fact it took all of 30 minutes!

Photo Aug 16, 9 26 04 AMI made a paper chain numbered 1-9 (the number of hours our drive would be) and attached it to the headrest of the passenger’s seat so it was in front of his seat.  Using Google maps I figured out where we’d be after an hour of driving, Photo Aug 16, 9 33 46 AM
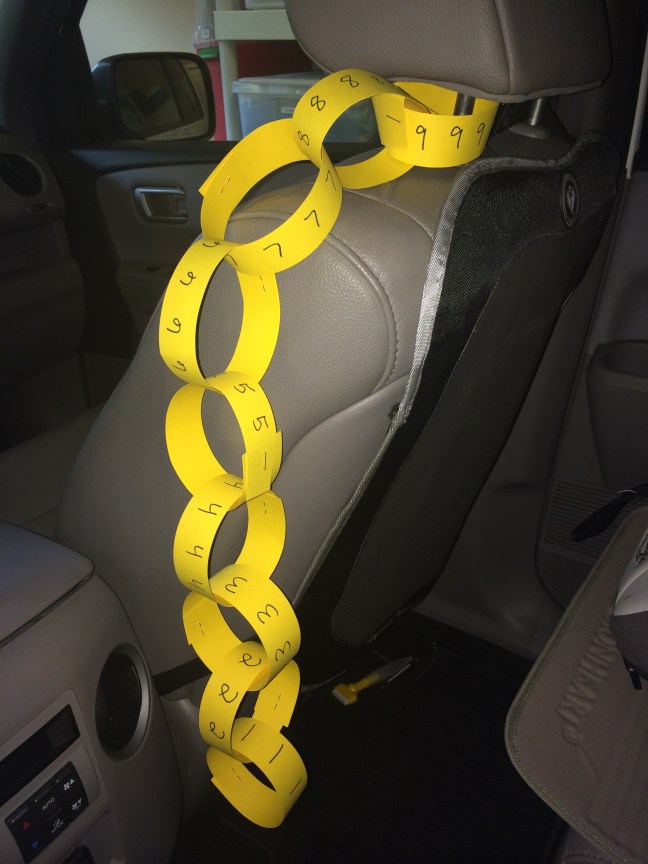
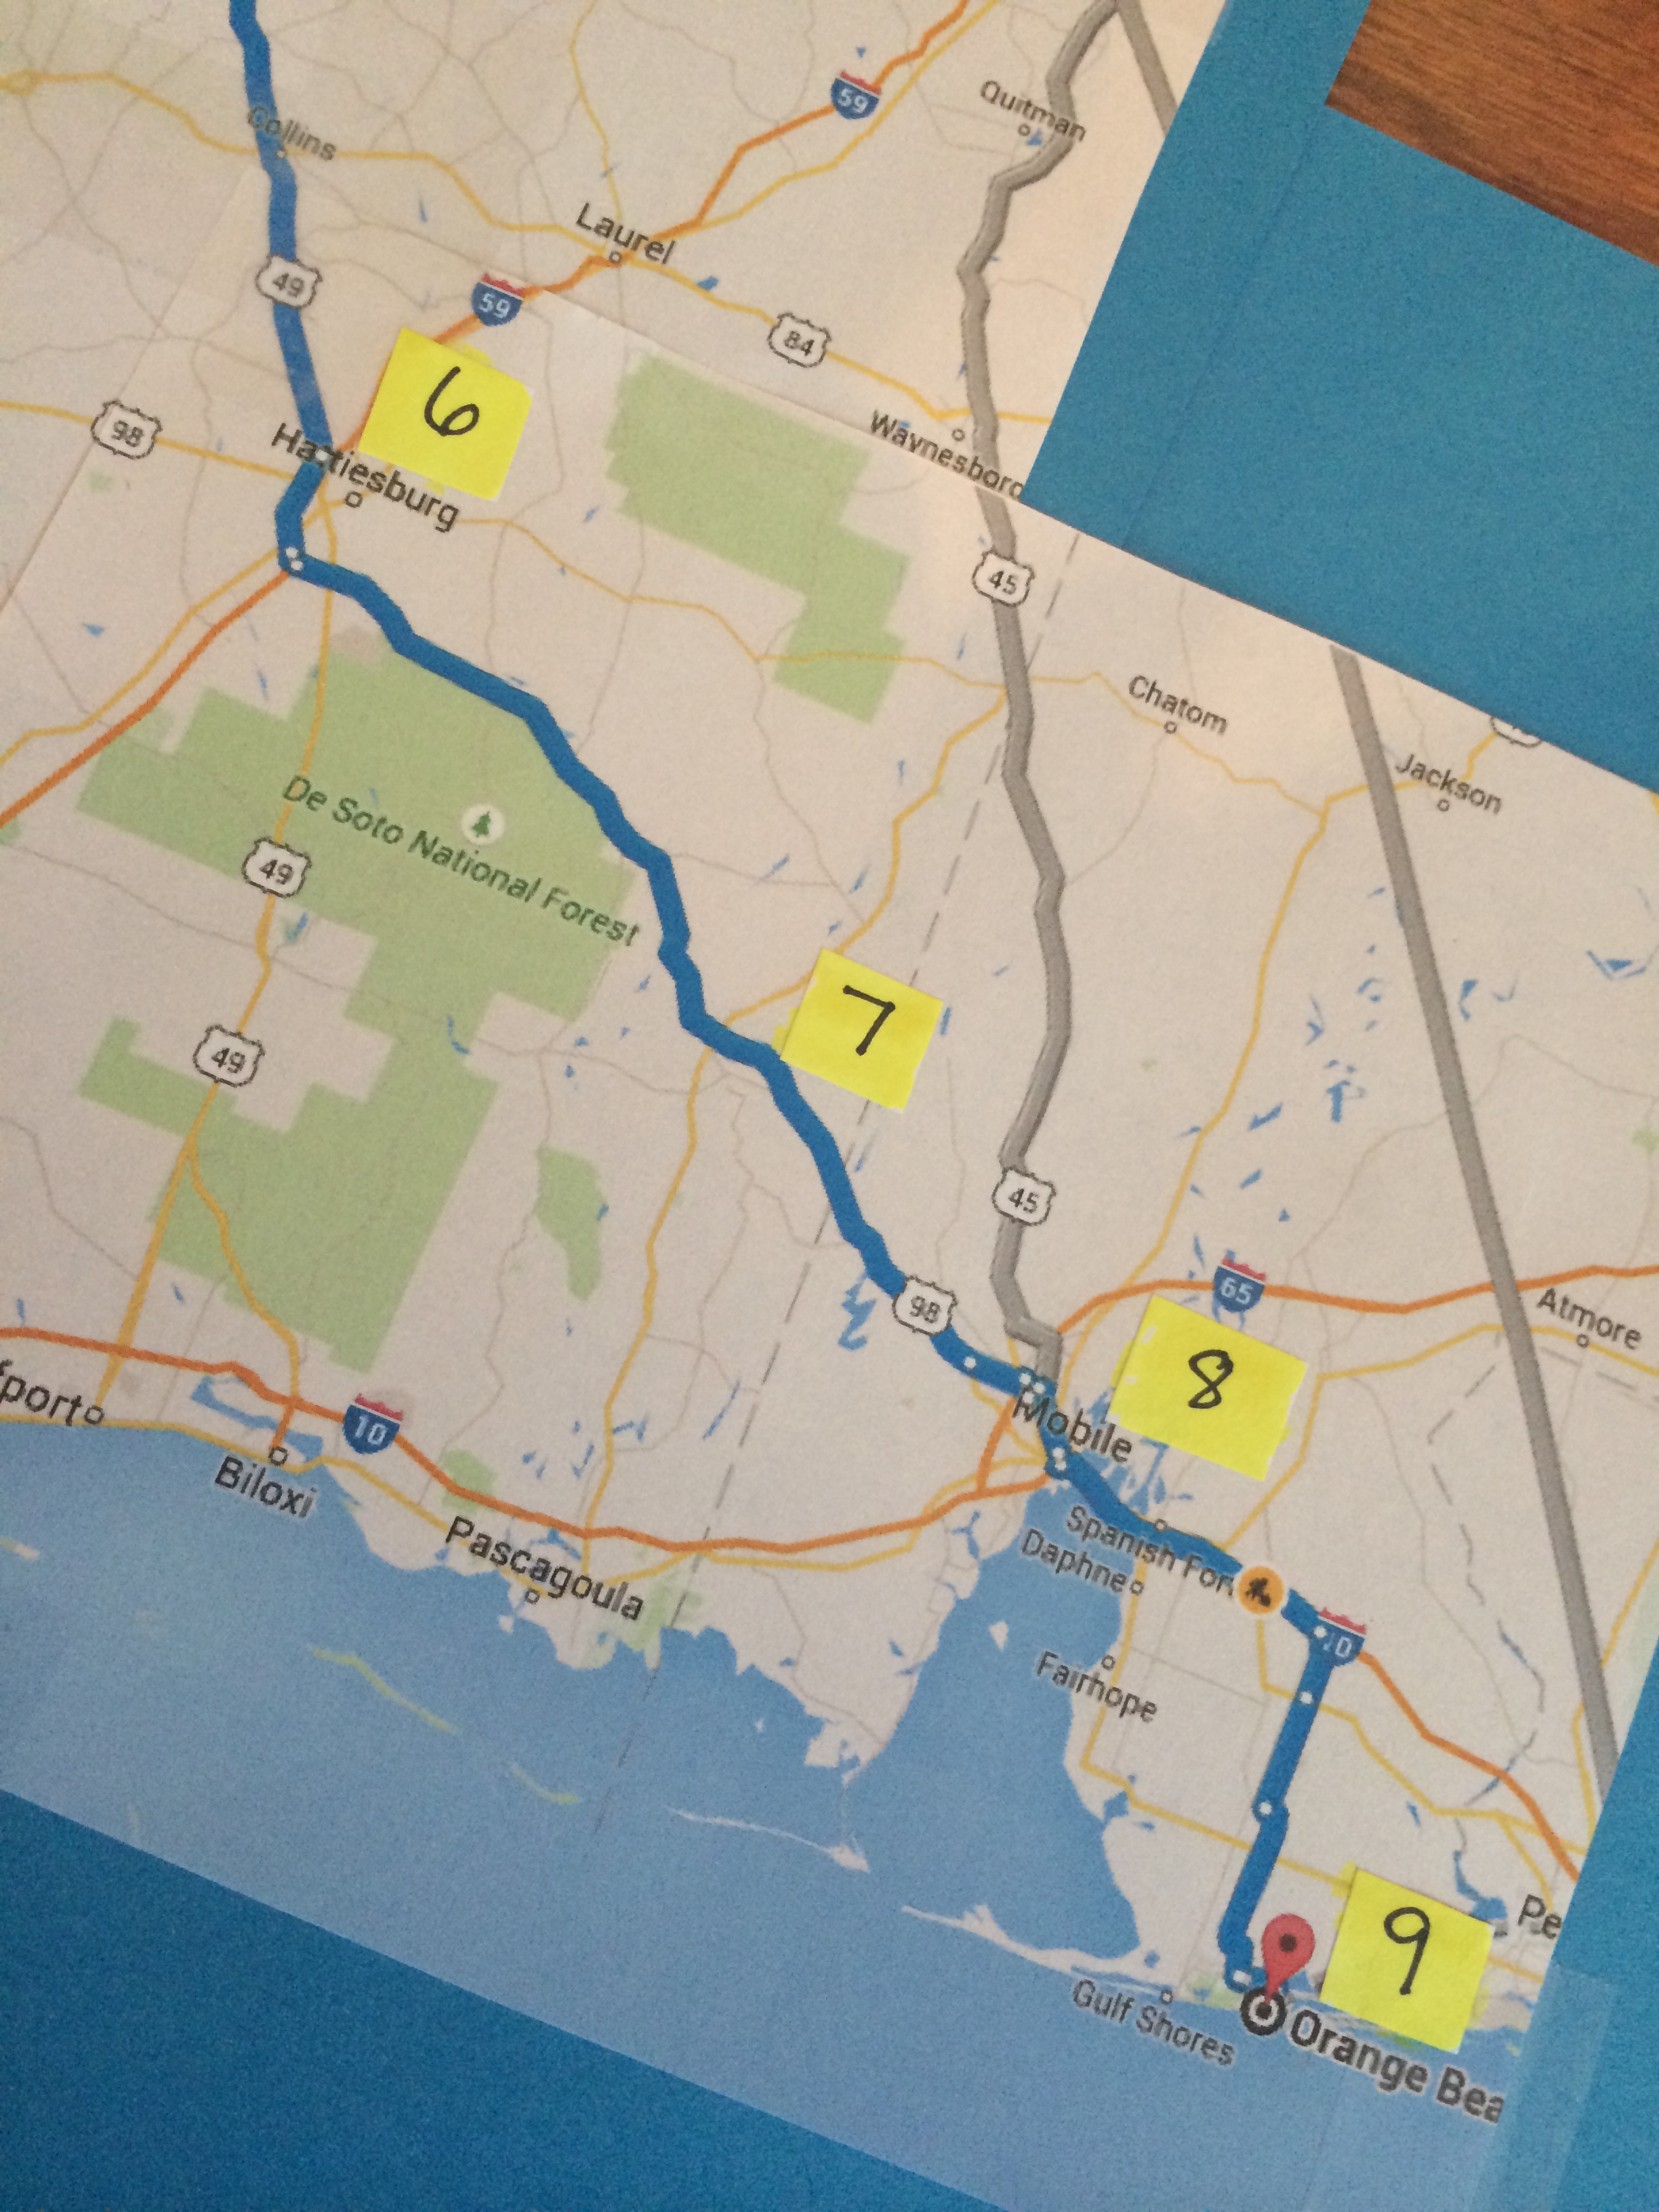
2 hours of driving, etc. I kept this list with me in the front seat as a reference.  You could easily take that part out of the project and just go by the hours on the clock, but this allowed for stops and rearranging of the schedule without running out of links in the chain.  I also made a 2nd set of links to pack along with the stapler so that I could set up a chain for the ride home.  I did the countdown backward that time (9, 8, 7…) so that he knew when we got to number 1 we were home.  You could also throw in different colored links to indicate the hours or locations when you plan to stop for meals or other scheduled stops.

Photo Aug 16, 9 25 07 AMIn my overachieving tendency, I made a map that corresponded to the stops.  While my son was fascinated by this for about 2 minutes he didn’t really use it as a visual as much as the simple chain. This would be a great activity for a slightly older child to help with map reading and directions however.

My son absolutely LOVED the chain.  It helped him see that we were getting closer but still had some time to drive.  When we got down to 2 links, he said, “we’re so close, but not yet!”  He did still ask several times if it was time to take another one off, but I would remind him that I would tell him when it was time and he’d say okay and keep playing.  We will definitely be using this again on all future road trips!

Another way to use the chain would be to draw pictures (for those who can’t read yet) of errands or stops that have to be ran on a particular day.  I know when we have a busy Saturday, my son likes to know the order of what’s going on, usually because we have to do some not so fun stuff (bank, post office, etc.) before we’re doing something more fun for him like going to the zoo or to lunch at a fun place.  This would allow him to see what stops have to be made before we get to the part he wants the most and could possibly help him from melting down when I say we still have one more stop to make.

3 Tips Before You Start Your Next DIY Project

Let’s set the scene.  You see a three day weekend approaching.  Or, you see a weekend that actually has some spare time available.  You think, “hey, I could actually get that big project done that I’ve been putting off because it would just take too long.”  Or you say, “I’ve been wanting to try to do this thing I saw on Pinterest.”  And that my friends is how a weekend of all the time in the world begins…

But so many times those blissfully hopeful weekends end with half-completed projects strewn about the house or garage with frustration and exhaustion mixed in among the tools, hot glue strings, trash and countless other things that were neglected as you attempt to just finish this one thing before you have to return to work the next day.

Obviously, I’m speaking from a purely hypothetical experience.  Not once have I ever started 6 different projects in a weekend and not have the supplies or time to finish any of them and nearly driven myself to a nervous breakdown when I had to return to my normal schedule on Monday with half the contents of my kitchen drawers splayed on the kitchen table because I had yet to find organizers that would fit in said drawers.  Nope, not me, just guessing that this happens to people.

So how do “people” avoid this trap of the DIY weekend?  I think there are 3 main steps to being prepared for the weekend project(s).

1) Make a Plan

This sounds ridiculous, but so many times projects start with an inspiration over Saturday morning coffee without much more thought put in to what’s next.  Whether it’s a day, weekend or week before you begin your project, you need to figure out what is your general plan.  For example, this weekend, we are reorganizing our garage.  (A necessity after everything was shoved in one corner during the installation of our storm shelter!)  Here’s what we’re dealing with right now:Photo May 14, 8 53 17 PM

First, I figured out what storage pieces I wanted to keep and what kind I wanted to get so I would know the skeleton of what I was working with as I started purchasing items.  I have taken a general stock of what’s in the garage knowing some things will be thrown out, some will stay and some will be reduced.  I have taking pictures on my phone so as I have shopped I know what I have that I will be organizing – what tools, what toys, etc.  I took measurements of the shelves so that I would know what storage containers would fit and if more than one would fit on a shelf together. Have a plan!

And here’s everything from the storage piece that we got rid of and will be transferring to new shelving, making a lovely home on my dining room table right now:

Photo May 20, 5 21 21 PM


2) Over Buy

As you shop to get prepared for your project be sure to find a store that allows you to bring back unused products and over buy.  This will save you time as you organize, build, clean, etc.  Use what you need so you can complete the project in one time setting.  Then, return the unused items either that weekend or later the next week.  This saves you from losing motivation, getting distracted and from losing time on unnecessary trips to the store.  Right now I own about twice as many storage boxes as I will need in various sizes and shapes.  However, I will be able to organize all that stuff on my dining room table without stopping because I have options.  Then, next week I’ll just easily return what I didn’t need.

Photo May 16, 6 04 46 PM


3) Evaluate Time vs Money

In the day and age of Pinterest we can get caught up in the idea of DIY.  While creating something from nothing can be rewarding, it can also be something we end up investing way more time and/or money than it’s actually worth to us.  So, as you begin planning your projects ask yourself why you want to do them.  Are they just for practical purposes?  Or will the creative work bring value to them for you?  Will the work you invest in them truly be saving you money or could you purchase a completed item for about the same amount?  Some projects are worth the effort, others are just a headache and would end up on the Pinterest fail website if the right people saw them.

I’ll give you an example of how I used this step myself recently.  I have always kept all my necklaces on one large hoop that hung on a single hanger in my closet.  It did the trick to keep my necklaces untangled most of the time but it was hard to see them all and I ended up forgetting about most of the ones towards the back because they stayed covered up.  So, I decided that I wanted to reorganize my necklaces.  First, I laid themout by design and color to see what I was looking at as far as number of hooks, etc.  Then, I got on Pinterest and started investigating how to go about making something of my own.  There were some great ideas, but the issue for me was that I wasn’t looking for a whole lot of frills, I just needs something simple to hang my necklaces on that didn’t take up much space and didn’t take a lot of time or money to make.  Then, I decided to look at Amazon to see what they had.  After a few word searches, I came upon this belt and tie hook for $7.99.   It’s exactly what I had in my head and it was cheaper than any of the supplies I was going to have to purchase for the projects I had just spent 30 minutes looking at on Pinterest.  It’s working beautifully to keep my necklaces organized by color and design and I spent less than 30 minutes unpacking it, sorting necklaces, and hanging them up!  Photo May 16, 6 06 33 PM

Photo May 16, 6 07 24 PM

Managing Time & Avoiding “Shoulda, Coulda, Woulda”

Time!  There’s never enough of it and when we do have it we seem to find ourselves spinning in circles figuring out which task on the never ending list to do first.

Part of being organized is simply about knowing how to manage your time so that you can get the most done in the time that you do have.  I strongly believe that we sometimes sabotage ourselves to keep from being more productive in fear that we won’t know what to do if we actually aren’t as busy as we’re made to believe we should be.  Or that we won’t be able to compare ourselves to all the other “busy” people we interact with in our daily lives.  But you know what?  We need to get out of that mindset right now, and tell ourselves that we’re going to figure out how to get our crap done when it’s supposed to get done!  Then, we’re going to enjoy our family time, our alone time and stop constantly thinking about what we “should” be doing.  AND, even better, we’re going to celebrate by actually enjoying the downtime we do have without experiencing the guilt of “shoulda, coulda, woulda” in our pajamas with a glass of wine or chocolate.  Or both – no judgment here.

So, how do we get to a place where we say the day’s work is actually done…and actually feel as though it was productive?  Here are a few things that you’ll need to do to get started:

  • Start figuring out where your time goes during the day. Track your time for the next week.  Keep a spreadsheet or a notebook and write down blocks of time and what you did during those blocks of time.  You don’t need to waste time being too detailed, but keep up with when you spent time on actual work projects, checking email, phone calls, in meetings, etc.  Then, also write down when chunks of time where taken up by non-related work events such as co-workers’ visits, helping restock toilet paper in the bathroom (true story), etc.  This will quickly help you realize where your time is going when you feel like you’ve worked all day but you’re actually not spending it all on “work.”
  • Identify your “timesucker(s).” This is when it’s time to be brutally honest with yourself.  What is your distraction that you turn to when you don’t want to start the next project or when you “only have 20 minutes” left of the day?  Is it facebook, candy crush, solitaire, chatting with co-workers, scavenging for food in the work room?  Be honest…what do you do when you’re avoiding working?

Now that you’ve done some self-examination, here are some simple changes that can quickly help make your day more productive and will help you get the most out of your time:

  • Using what you discover using your time log, come up with a general game plan for your days’ schedule. Each day may look different if you have meetings scheduled but you should have a plan for when you’ll be at your desk and when you’ll be up and around the office.  If you are most productive in the mornings, you need to be at your desk in the mornings.  Tell yourself that your “visiting” half hour can wait until the afternoon when you need a little energy and then do all of your stops at once so you don’t spend more time than needed going back and forth to your office.  Set an alarm on your phone to keep you on track.  Or that your second cup of coffee doesn’t come until after emails are caught up so that you don’t set yourself up to be in the workroom for an extra half hour before you’ve accomplished anything in the day yet.
  • Set a plan for yourself for how to use your timesucker. For example, you can set a reward for yourself that you can get on facebook for 10 minutes (again, set an alarm) once the most important project of the day is completed.   If you are distracted by facebook or other websites, there is a website called focalfilter.com that allows you to temporarily block yourself from websites.  You can set the time limit and the sites so it’s an extra reminder that you’re supposed to be getting that project done first!  If your timesucker is something more like a chatty coworker or just getting generally distracted on a number of things, set an alarm on your phone every hour at 10 minutes to the hour.  It will be a regular reminder to stay on track and will give you a way to excuse yourself to an imaginary meeting or conference call if you’re in a conversation that should have ended 15 minutes ago.
  • Many times we like to feel productive by doing the easiest, quickest things on our list first. However, if you’ll pick the two hardest or most time consuming things to get done first then the rest of the day will be much easier, more productive and you won’t have the big projects looming all day.  If you get distracted easily, you can use http://inboxpause.com/ to temporarily pause your incoming emails until you finish the project so that you don’t feel like you have to stop working on your project to answer them. If you don’t have gmail, just close your inbox.  It won’t hurt them to not be seen for just a few hours while you concentrate on finishing one thing from start to finish!
  • One of the best ways to be productive is to have a plan when you walk in the door in the morning rather than spending the first 30 minutes figuring out what you have to do that day. This can easily be accomplished if you follow my guidelines of cleaning your desk, to do list and inbox at the end of each day.  You can find out more about how to end each day so that tomorrow is more productive in these 3 posts:

There’s No Stress in a Clean Desk: Simple Steps to Getting and Keeping a Clean Desk

You’ve Got…No…Mail: Simple Steps to Getting and Keeping a Clear Inbox

Much To Do about Something: How to Create and Manage a To Do List That Actually Works


It’s Giveaway Time!

Recently, I made this fantastic basket of some of my favorite organizational tools as an item for a silent auction for one of my favorite non-profits.  While I was creating it, I decided to share another basket of goodies with one of you!  So, I’m running my first-ever giveaway beginning April 27 at midnight and ending on May 5 at midnight

You can enter to win 4 different ways:

  • By subscribing to follow this blog.  If you’re already following the blog, no worries, you’re name will be automatically entered!

Or you can use this GIVEAWAY LINK to sign up in these ways:

  • By visiting the No More Manic Mondays facebook page…feel free to like or share it while you’re there but it’s not required to be entered to win!
  • By following No More Manic Mondays on twitter.
  • By following No More Manic Mondays on Pinterest.

You can enter all 4 ways for 4 chances to win, just be sure you use the actual giveway link above to be sure your name gets entered correctly.

Keeping Housework from Making You Cringe: Step 1

Do you constantly struggle with the battle between the never-ending tasks of maintaining a household while also trying to figure out how to actually spend time with your family?  Too bad our families don’t think “Fold the Laundry Night” or “Scrub the Toilet Night” is ideal quality time.  That would solve everything!  But, since toddlers would rather sit in the laundry basket and teens don’t even know where the laundry basket is, I guess that fantasy will stay in my head.

So, in the meantime, I have figured out some tricks to keep up with housework each day so that sanity is maintained while also not spending too much time on any of it so I still spend time with my family each night.  I’ll tell you about the first step today and share the rest soon, so stay tuned!

 The key is to this method is to know yourself and the areas that truly make YOU cringe.  I mean, what makes you grimace, roll your eyes and start your day off in a bad mood when you see it first thing in the morning?  Is it the sink full of dishes, dirty countertops, clothes on the floor, shoes by the door, a floor that hasn’t been swept, something else?  Pick your top 3 cringe-worthy areas in the house.  Mine are the kitchen sink, the kitchen counters and the living room couches.  Okay, got your 3 areas in mind? Let’s move on.

Now that you’ve picked your 3 areas, you need to develop your routine. Every night before going to bed, I make sure the kitchen sink is empty.  Usually this is done after dinner during clean up, but I double check that there are no glasses left from the rest of the evening, etc.  Then, I clean the kitchen counters.  It’s incredible to me what a few swipes of a paper towel can do to one’s perspective.  Finally, I straighten the couch cushions, fold the blankets and straighten the items on the end tables next to the couch.  All total this takes about 10 minutes each night.  But it makes my mornings start on a good note because the areas that bug me the most and make me feel like the house is the dirtiest aren’t staring me in the face as soon as I come out of the bedroom.   The only way this works is for you to pick the areas that truly drive you up a wall.  It might be something small or something that doesn’t even bug anyone else in the house, but if it’s your trigger, that’s what you need to focus on each night during the week.

While we’d all love to wake up to a sparkly, shiny home every morning, that idea is just plain delusional.   So instead, make sure to wake up each day in a home that at least has your 3 most cringe-worthy areas as sparkly and shiny as possible so you can just make it through the week.  So during the week while I might not have time to clean, I do at least wake up knowing that the things that could get under my skin the most are already starting off clean, straightened and ready for the new day.

To Do List 101

To Do List 101

A Simple Approach to Managing Your Personal To Do List

 I think one of the toughest parts of our duties of “home” is actually just keeping up with what we have to get done.  Keeping up with a to do list is one thing, but actually working a to do list is another.  Whether you keep it electronically, on paper or a combination of the two, if you don’t have a clear plan to check items off, add things to it and evaluate it at certain intervals it will seem like a never ending and overwhelming process.

Last week I shared how I keep up with my work task list using the GoodToDo.com site and app.  For a little more info about my take on to do lists and the GoodToDo Site and app, you can read that post here.  I also have a personal category in my GoodToDo list that helps me keep up with recurring weekly personal tasks such as cutting coupons, grocery shopping, cleaning house, laundry, etc.  and monthly tasks such as the month’s menu, my son’s picture calendar, pay bills, etc.  I also use the GoodToDo list to keep up with personal tasks that are farther out than one week so that when I get to that week I will remember to take care of them.  For example, if we get an invitation to a wedding I will put a task saying “purchase wedding present for so-and-so” on the Friday of the week it needs to be purchased.  I put all my personal tasks on Fridays so I that when I go to make my to do lists on paper for the week I know where to look and have one master list to go off.

So, each Sunday afternoon I make my to do list for the week on paper.  I use paper for my personal to do list for a couple of reasons.

  • First, I found that when I kept it in my app, I was on my phone a lot around my family trying to check on my list. This made my son want my phone constantly when he was younger and it made me feel like I was giving a bad impression.  (I’m still bad about being on my phone too much but at least this way I’m not on it more!)
  • Second, I need to be able to see my whole list on one page so that I can quickly scan it to see what I can get done in the time available. The GoodToDo site and app are great in a work setting, but harder to see as big picture.
  • Third, I don’t need a record of my accomplished tasks like I do in my work setting. I love that I can track what I’ve accomplished every day using the GoodToDo app, but no one is going to ask when I wrote the grocery list, so it’s not as important to have the electronic preciseness for my personal tasks.

Instead of outlining what I need to do each day, I make my list by categories of activity.  My categories are:

  • Photo Apr 15, 2 54 36 PMErrands
  • Phone Calls
  • Computer Work
  • Active Tasks – I count these tasks as ones that will require energy and me to be up and moving at the house such as cleaning, doing laundry, yardwork, cleaning the frog tank, etc.
  • Non-Active Tasks – I count these tasks as ones that will not require a lot of energy or could even be done while sitting on the couch such as cutting coupons, sending a text, making the grocery list, etc.

Having categories helps me use every spare moment of time rather than staring at a jumbled list of 20 tasks and trying to figure out what I could get done next.  If I have a larger chunk of time I can look at the active list and get one of those tasks done.  But, if I only have a few minutes before my son wakes up in the morning or if I’m tired at the end of the day and ready to sit on the couch, I can just pick one or two things off the non-active list to get done.  That way I still get a couple things accomplished but without a lot of effort.  In the same thought, I make phone calls when I have downtime in the car or if I’m in waiting room.  To help speed these calls up, I write down the numbers on my to do list on Sunday when I’m making the list so as soon as I have a few minutes the number is right there for me and I don’t waste time looking for it.  I also look at my errand list and assign each task a day of the week if I know that I’ll be in the area of that area already one day in order to save time.  Then, the rest of the errands get fit in when possible or on the weekend.  It’s important to look at your list each morning and evening to remind yourself what’s left and to try to do a couple of things each day so that you don’t leave yourself a long list on the weekend.  You have to shape your list to your family’s needs and your family’s schedule.

I try to accomplish everything on my to do list by Saturday evening so I have Sunday to relax and enjoy downtime.  This creates less pressure than a daily to do list because some days are harder than others and I just want to do nothing by the time dinner and the bedtime routine is over.  Other nights I have enough energy to accomplish a few extra tasks.  By working a weekly list, I have flexibility without feeling guilty or pressure.  Sometimes it works, other times life happens and it doesn’t  work, but it’s a good way to look at your list as having a beginning and an end so it doesn’t feel like it just keeps getting added to week after week.  Each Sunday, I make a new list and add anything from the previous week that didn’t get done to it so I always start with a clean list.

Going Off Schedule…I’m a Good Mom and So Are You

Going Off Schedule…I’m a Good Mom and So Are You

A Response to Yet Another List I Shouldn’t Have Read

 Well, the schedule for today called for a post about the dreaded kid’s closet change over.  I know you were waiting on pins and needles for it and I promise to get it back on the schedule very soon.  But, I recently read something that has grated on me a bit and the routine-loving momma in me wanted to write about it.

The article I read was a list of things that the author declared she was going to stop doing that “good moms” do.  I’m not so sure why this article stuck with me when so many of the things I read off social media just roll off me.  The word “good” might have something to do with it.  That word is so hard on moms.   We judge ourselves and other moms with that word all the time.  Maybe putting it in the title just made it a gut punch right off the bat because that word “good” can be so black and white for so many of us when we let the guilt of motherhood take over the few rational parts of our brains that haven’t been shut down by lack of sleep already.

But, my organizational, routine-loving head really started to spin when I got to the list of things that the author planned to give up doing.  Now again, the title of the article implies that “good” moms will continue to do these things.  But the whole premise of the article (at least in my opinion) has an undertone of judgmental eye rolling towards moms who would consider continuing these tasks.

The two tasks that seemed to bother me the most that the author plans to give up are bathing her kids every day (going to a few baths a week) and having an elaborate bedtime routine.    As a person who loves routine and believes that kids do well with routine and structure, I’m all about some kind of nighttime routine.  Especially with younger children, I believe they need the cues of routine to know what to expect and to know what is expected of them.  And, yes, I bathe my kid every day and  I have since he was a few weeks old.  I think it’s an important part of his routine.  It’s a trigger that it’s time to start winding down and get ready for sleep (precious sleep!)  It’s a way to get off daycare/school grossness and keep his bed and stuffed animals clean(er.)  And, it’s a time for him to play, be silly and to ask him questions about his day when he’s not distracted by too many other things.  I find daily baths and nighttime routines incredibly important for my child.  I get that every family has what works for them.  I guess it’s not so much about the tasks listed, in fact I could agree with some of the tasks she plans to give up.  Again, I think what dug into me was more about the word “good” and the judgement that I either felt emanating from that word because I disagree with some of the points in the article.

I’m completely used to disagreeing with the many articles and the lists that I run across daily.  I read, agree, disagree, say “hmm,” maybe share some of them and then I move on.  But, when one crosses my path that has potential to make that little dig that no mom needs but we all know is hovering, waiting on the chance for our minds to be weak enough to let it in, dig a little and plant yet one more seed of mommy guilt apparently that’s when I finally speak up.

Much TO-DO About Something

Much TO-DO About Something

How to Create and Manage a To-Do List That Actually Works

The ol’ to-do list, task list, agenda, and so on.  Whatever your name for the one you use, it’s one of the most important items to keep you on track and productive.  But what’s the point of keeping a list of any kind if you just keep adding to it, perpetually re-writing it without every making actual progress, or continuing to forget to do things?  By creating a to-do list and actually learning how to use it you can increase your productivity and be sure that you are accomplishing tasks on time which helps develop your credibility.

I use to do lists in both my work life and my home life.  They look different for both because I have different needs for those worlds.  I’ll be writing about how I make and manage my to-do list for my home life next week, but some of the things I share here will apply and carry over.

  1. The first step of a good to-do list is choosing the best actual way to keep your list. There are a variety of ways to keep a list.  I’m a big fan of an electronic list.  Paper lists can cause trouble – they can get lost, get ruined by spilled drinks/food, they get messy and you waste time rewriting them, and they’re harder to use for long range planning/recurring tasks.  Do some research to find the best list for you.  My favorite is goodtodo.com.  I like it for a few reasons:
  • It is web based so I can access it anywhere but it has apps for the iphone and ipad so I can add things on my phone and it will sync easily. (They don’t have an app for androids yet unless that’s happened recently so be sure do research that before you get really excited about this one!)
  •  Photo Apr 08, 9 33 47 PMIt’s free, but for $3 a month it will allow you to keep unlimited categories. I use this since I have 4 different areas at work.  That way I can track what tasks I have to do in what areas.  I also keep a personal category that helps me track tasks on a long term basis. (I’ll explain this in a later post.)
  • It lets you set up recurring tasks for every day, every week, every month, every year, etc.
  • It allows you to add a task to your to do by forwarding an email directly to it. Check out the about section and watch the video for more details about this feature.  It’s really neat and will help you keep that inbox clean (read why I think that’s important and how to do it here).

There are lots of other online to-do lists that have similar features.  Some others (among many more) are www.wunderlist.com, www.rememberthemilk.com, www.toodledo.com.  You need to do your own research and find the one that works for how you work.  Make sure the “look” works for you, the features do what you need them to do for what you do and then make a commitment.

  1. The second step of a good to-do list is creating a master task list. This is daunting and will probably make you want to throw up.  It’s okay, don’t feel like you have to do this all at once.  And know that every time I’ve shared this step with people the first reaction is an audible groan, the next is their eyes bugging out and then comes acceptance.  (I think they still say bad things about me as they make their lists, but that’s okay, it will be worth it!)  The master task list should include absolutely everything you can think of that you know that you have to do in the next 3 months – at least.    If you already have projects or events on the calendar past 3 months, then at the end of the 3 months one of your tasks needs to be “brainstorms tasks for next 3 months” so you can be sure to stay ahead of the game as you get this process under control.
  1. The third step of a good to-do list is making a master list of recurring tasks. Any tasks that happen on a regular basis – daily, weekly, monthly or yearly.  For example, if you put out a newsletter at the first of every month, then I would suggest that a recurring task “work on next month’s newsletter” is set up for the 25th of each month.
  1. The fourth step of a good to-do list is then assigning the items from your master task lists to actual days on your new to-do list. One of the mistakes I think people make is that they try to keep one master list and just work off of that all the time.  Instead, you should have tasks assigned to the day of the week that they need to be done and so you really end up creating smaller to-do lists that are actually manageable.   A few things to keep in mind as you complete this step:
  • You should always look at your calendar as you set up your to-do list. Assign tasks that you will have time to get accomplished during the time you that day.  For example, if you have meetings scheduled most of the day, don’t expect to get 20 things accomplished that day also.
  • Try to have a mix of small, administrative tasks and larger, more time consuming tasks each day. This will ensure that something will get accomplished every day, even if something comes up and you only have a little bit of time.

Now that your to-do list is set up, it’s all about maintaining it so that you can truly use it and be as productive as possible.  Here are a few tips to keep it mind as you begin to use it and learn to work the system:

  • Spend a little time at the end of each week looking at the next week’s calendar and the next week’s to-do lists to be sure that the days’ tasks still work with the days’ schedules. Rearrange and move around tasks before you start your week so you don’t start by being overwhelmed on Monday morning.
  • On a similar note, as I noted in the previous two posts in the Office category about keeping your desk and your inbox clean, you should also keep your to-do list clean. At the end of each day as you clear your desk and your inbox, you should then go through anything left on your to-do list for the day (if there is anything) and move the tasks to either the next day or to another day to be accomplished.  Many electronic to-do lists will just automatically roll over any unchecked tasks.  However, if you allow this without looking to see if you can really accomplish what’s left on today’s list according to what’s on the calendar for tomorrow you run the risk of allowing too many things to just continue to stack on to one day and become overwhelming.
  • Add anything unexpected that you did during your day that wasn’t originally on your list to your list and then check it off. This sounds ridiculous, but it’s important to keep up with what you did during the day, even if it’s not what you planned to do.  This can come in handy when you’re trying to track when something got finished (perhaps if your boss asks?!) and is just a general way to know where your time went for the day.
  • When in doubt, put it on the list. I say this because I think many people make the mistake of only putting the “big stuff” on their list assuming that they’ll just remember the other stuff or that it will just happen.  That’s how details get forgotten.  An example: any time I put a meeting on my calendar, I automatically put “put tasks from blah blah meeting minutes on to-do list.”  This way, I automatically have a follow up in place even if I don’t have details yet. Even if I don’t end up having any action items after a meeting, I can just take that item off my list but at least I knew that it was there as a safety net to remind me to follow up quickly after the meeting.

The key to a good to-do list is actually working this list.  You have to keep up with it on a daily basis, add to it, check items off and keep up with how it’s working with your schedule.  Keeping your expectations reasonable on a daily basis with smaller lists rather than working off a huge list will help you from feeling overwhelmed and as if you don’t even know where to start!

Good luck and I’d love to hear what to-do list you decide to use!